Introduction
Have you ever encountered a message while downloading or installing an application like, “This app is harmful to your device?” You will get such a message while downloading unauthorized apps or software. This is where a Code Signing certificate comes into play and helps app publishers authenticate their identity to users.
Application publishers can request the Code Signing certificate and digitally sign their applications for enhanced security. Developers must generate a Code Signing Request (CSR) with a private key and submit it to the certificate authority (CA).
When CA receives the CSR with crucial information from the developers, the verification process begins after issuing a thorough vetting certificate. In validation process, the CA verifies the legal status of a company. This article will focus on generating CSR, getting a Code Signing certificate, and installing it on a Windows machine.
What is a Code Signing Certificate?
Like a badge of trust on the authorized document, a Code Signing certificate ensures that users can verify whether an application’s source is authentic. It allows application publishers to verify whether their application is authentic or not.
A Code Signing certificate is a digital certificate type that you can use to sign applications, code scripts, and other files to ensure integrity. It prevents unauthorized modification or software tampering, potentially spreading malware or malicious activities.
Code Signing certificates work based on cryptographic encryptions, which have two security key pairs, one for encryptions and the other for decryptions. Encryptions ensure that the communication between a user’s device and your app servers for data exchange remains secure.
If you want to install a Code Signing certificate on Windows, you must choose the right type. For example, suppose you want to secure an enterprise-grade application. In that case, choosing an extensive validation type certificate makes sense because it gives users higher trust by vetting all the organization’s details.
How to Install a Code Signing Certificate?
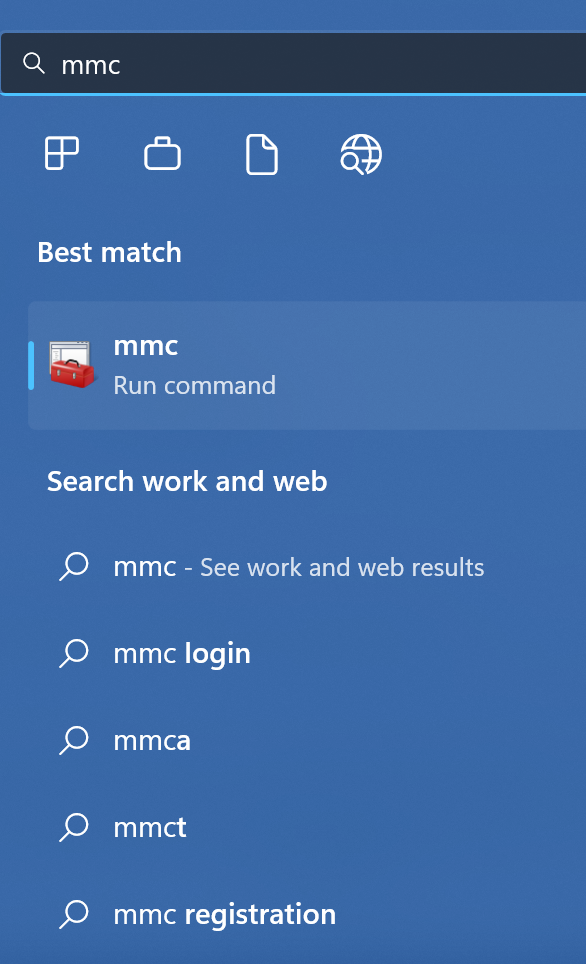
Once you choose the type of certificate, installation process begins. First, you need a CSR, and to generate one for your application, head to search in your Windows machine and type “mmc.”
Now, click “File,” and choose “Add/Remove Snap-in.” Choose Certificates from the list of options provided. Then, click on Add and select Computer account.

CSR Generation Process for Windows
Choose “Local computer” and click Finish. Click OK on the Add/Remove Snap-in window. Save these console settings for future use. To access your MMC snap-in, right-click the Personal folder, select “All Tasks,” choose “Advanced Operations,” and then “Create Custom Request.” Further, select All Tasks > Advanced Operations > Create Custom Request.
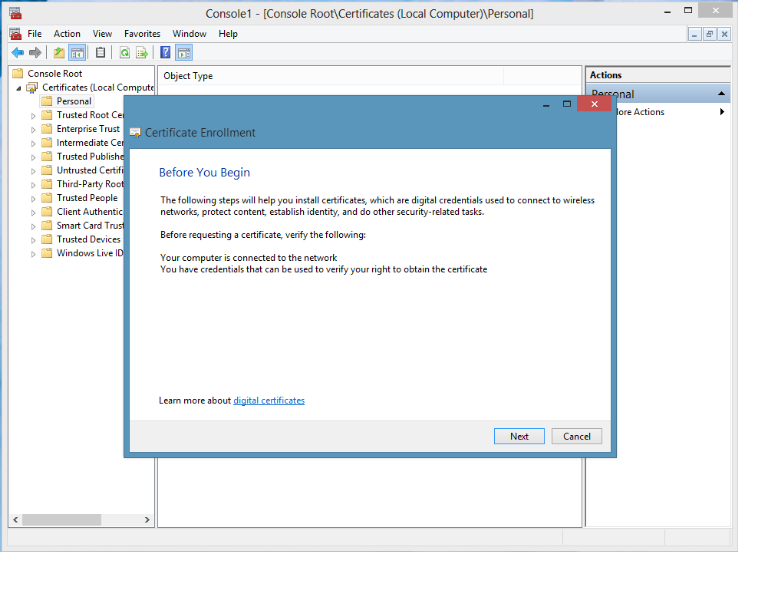
A CSR generation wizard will open where you need to select “Next” Opt for the Proceed without enrollment policy option and click ‘Next’ again. Once you are at the PKCS # 10 window, hit Next once more.
Enter CSR Details for Your Organization!
From there, select Properties in the Details drop-down menu and enter a Friendly Name of your preference. Access the Subject tab and include the necessary distinguish name values for your CSR, such as CN(Common Name), O(Organization), OU(Organizational Unit), S(State), L(Locality), and C(Country/Region).
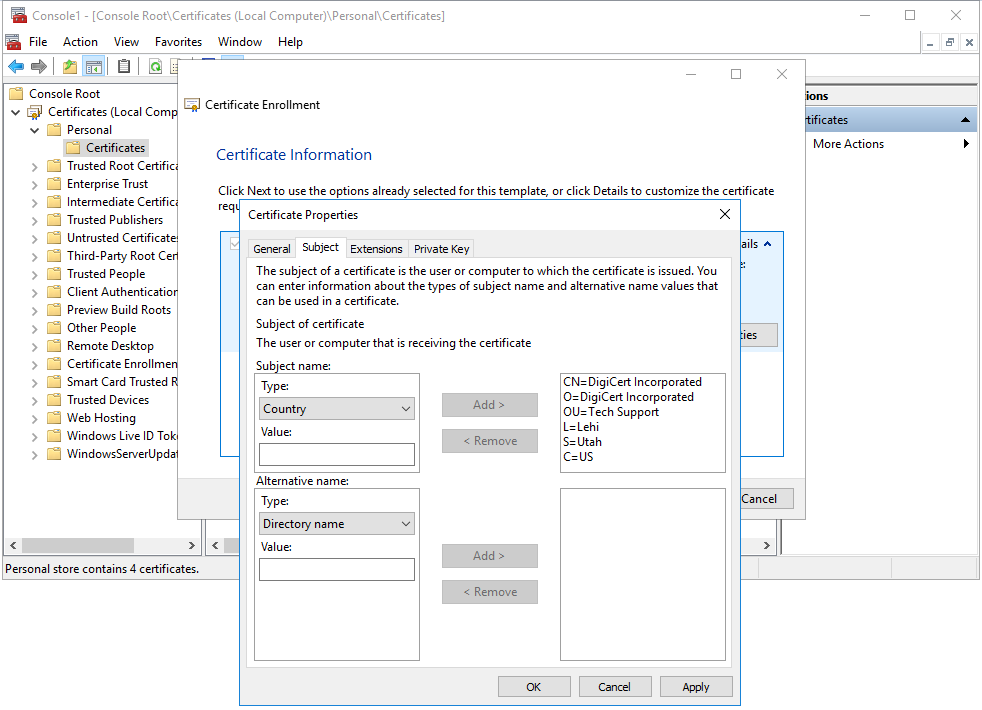
Do not forget to include the Common Name, which secures the registered organizational name that the certificate will be issued to, and the Organization, which is the registered organizational name the certificate, belongs to. Be sure to spell out or omit any symbols and avoid abbreviating state or province names.
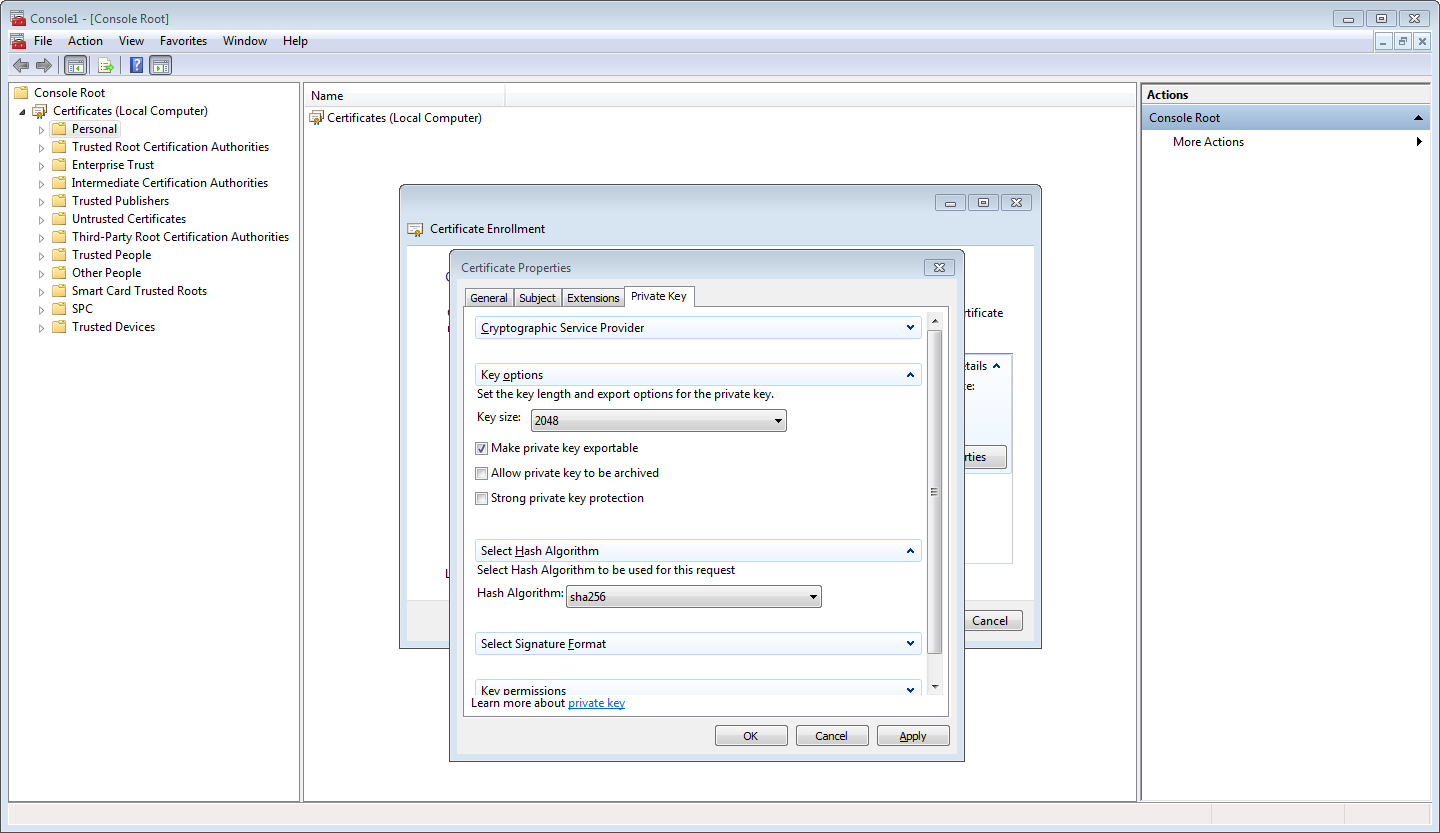
After you have filled in all the necessary details, click the Private Key tab and select Key size: 2048. Check the option to Make the private key exportable and then select sha256 under Select Hash Algorithm.
Finally, hit Next, Browse, and choose a location to save the CSR file. Give the file a name and select Save. Now your CSR file is ready to be submitted to the CA.
Install Code Signing Certificate Using Cert Manager
Before you install Code Signing certificate, you should submit the CSR, CA will verify the details and issue a Code Signing certificate. CA will send a bundle through email that will have the certificate file. Now, save the file on your local machine in the PKCS file (.PFX) format.
To install Code Signing certificate on Windows, head on to search and type, “Manage User Certificates.”
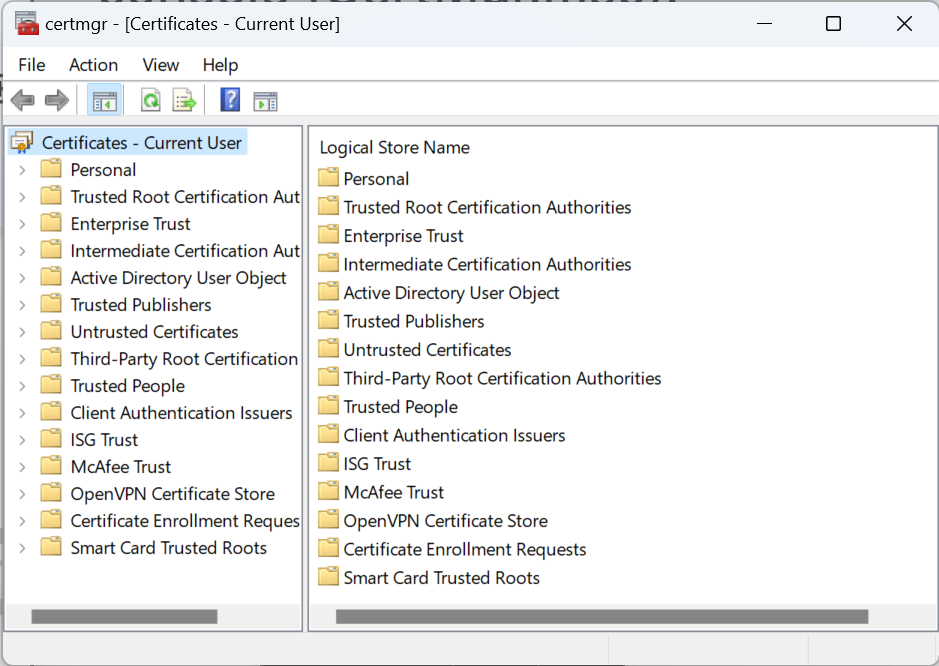
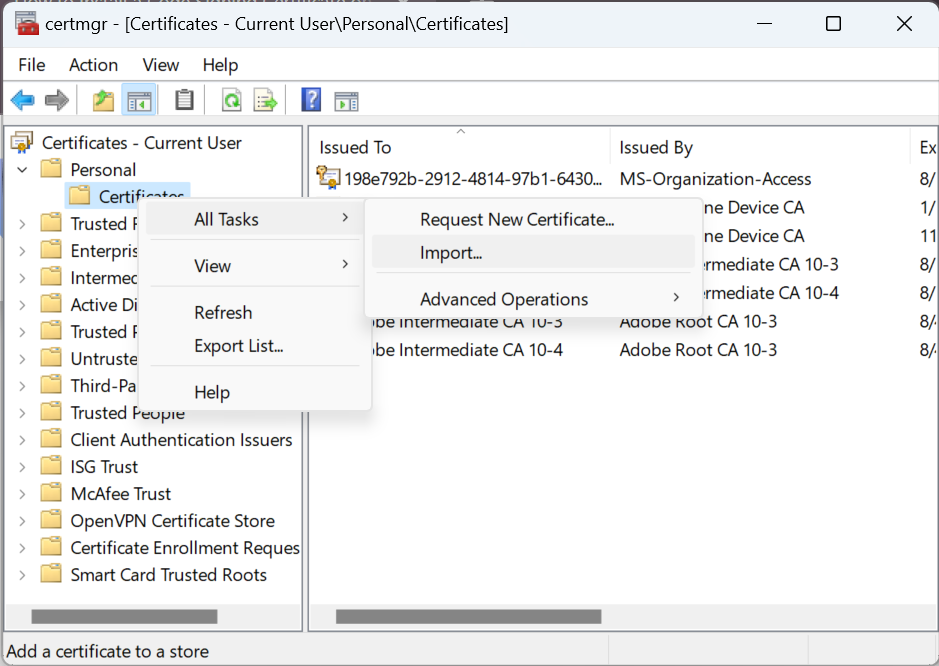
On the left-hand menu of the cert manager window, double-click on the folder called, “Personal.” Now select “Certificates” and choose all tasks. Now click on import in the “All Task” menu.
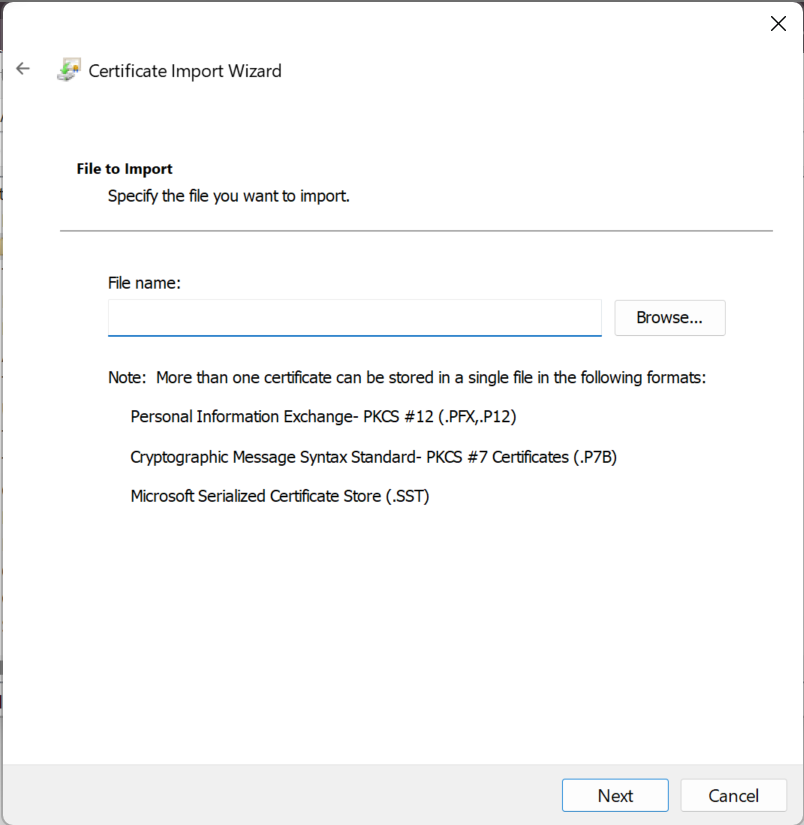
A new window will open to install Code Signing certificate on the Windows machine. Click on next and choose the path to your file saved on the local machine.
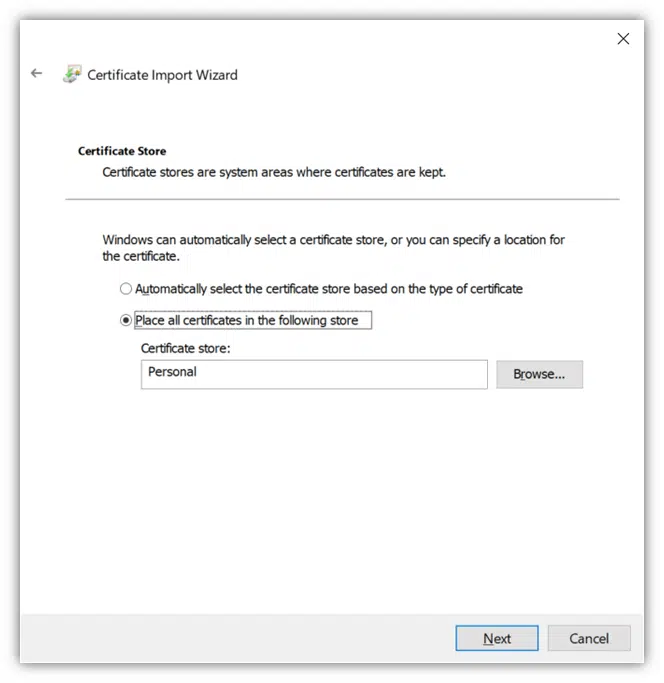
Next, you must enter the certificate password and choose the certificate store you want to import or install a Code Signing certificate.
Click on next, check the details like certificate store, content, and file path. Lastly, click on finish to complete the process of installation. You can verify if the certificate is installed or not by going back to “Personal,” and then “Certificates.”
Conclusion
Increasing cybersecurity threats require efficient security systems. A Code Signing certificate offers enhanced security for your applications. Installing it on your Windows apps and machine can help secure user experience. We have discussed crucial steps to install the certificate on a Windows machine. However, steps and processes can vary based on the specific requirements of your project.