Content Highlights
If you’re new to graphic design or just getting started with Photoshop 7, you’ve come to the right place! Although Photoshop 7 is an older version of the software, it still offers powerful tools and capabilities that make it a fantastic option for beginners. Whether you’re editing photos, creating designs, or learning the basics, this guide will walk you through the essential steps to get the most out of Photoshop 7.
Before diving into the tutorials, if you haven’t downloaded Photoshop 7 yet, you can get started by visiting our Photoshop 7 download page to find a safe and legal copy.
1. Installing Photoshop 7 on Your Computer
First things first, if you haven’t already installed Photoshop 7 on your computer, you’ll need to do so. Fortunately, the installation process is pretty straightforward. Check out our installation guide to help you through the setup.
Once you have Photoshop 7 installed, you’re ready to start exploring its features!
2. Understanding the Photoshop 7 Interface
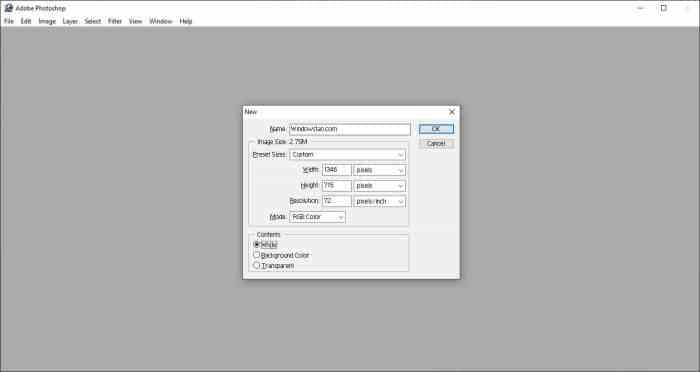
When you first open Photoshop 7, the interface may seem a bit overwhelming. But don’t worry, with a little practice, you’ll get the hang of it. Here are the main components you’ll interact with:
- Menu Bar: At the top of the screen, the Menu Bar provides access to all the tools, file options, and preferences.
- Toolbox: On the left side of the screen, you’ll find the Toolbox, which contains all the essential tools for photo editing and creating designs.
- Layers Panel: Layers are essential for non-destructive editing. The Layers Panel, usually located on the right, lets you organize and manage different elements of your design.
Take a moment to explore the interface and get comfortable with the layout. You’ll soon find that it’s a lot easier to navigate than it first appears.
3. Basic Photoshop 7 Tools You Should Know
Here are some of the most basic tools in Photoshop 7 that every beginner should get familiar with:
- Move Tool (V): This tool allows you to move elements within your workspace, such as images or shapes.
- Marquee Tool (M): The Marquee Tool lets you select rectangular or elliptical areas in your image. Once selected, you can apply edits to just that area.
- Brush Tool (B): The Brush Tool allows you to paint over your image or create shapes, and you can adjust its size, hardness, and opacity.
- Healing Brush Tool (J): One of Photoshop 7’s standout features, the Healing Brush helps you remove blemishes or imperfections in an image by blending them into the surrounding area.
To explore more tools and features, check out our features and tools guide, where we break down each tool in detail.
4. Basic Editing Techniques
Let’s go over a few simple editing techniques to get you started:
- Resizing an Image: To resize an image, go to
Image > Image Sizefrom the menu. This will allow you to adjust the dimensions or resolution of your image. - Cropping: If you need to remove unwanted parts of your image, use the Crop Tool (C). Just drag the corners to select the area you want to keep and press Enter.
- Adjusting Brightness and Contrast: To enhance your image’s lighting, go to
Image > Adjustments > Brightness/Contrast. This tool lets you make quick adjustments to improve your photo’s exposure.
These basic techniques will help you get started with photo editing, and you can experiment with them to improve your skills.
5. Using Layers for Non-Destructive Editing
One of Photoshop’s most powerful features is its use of layers. Each element in your project can be placed on a separate layer, which allows you to edit them individually without affecting other parts of your design.
To add a new layer, go to Layer > New > Layer. You can create layers for text, images, shapes, or anything else you want to add to your project. If you ever make a mistake, don’t worry—layers let you undo actions without affecting the rest of your design.
If you want to learn more about layers and how to use them efficiently, our benefits of Photoshop 7 page dives deeper into how layers improve your workflow.
6. Saving Your Work
After creating your masterpiece, don’t forget to save it! Photoshop 7 offers several formats to save your work:
- PSD: This is Photoshop’s native file format, which preserves all your layers and edits. Use this if you plan on revisiting your project later.
- JPEG: If you’re ready to share or print your work, save it as a JPEG for easy sharing and smaller file sizes.
Simply go to File > Save As and choose the appropriate format.
7. Troubleshooting Common Photoshop 7 Errors
If you encounter any issues while using Photoshop 7, don’t panic! Common problems include crashes, slow performance, or unexpected behavior. Luckily, we’ve got you covered. Our common errors and fixes guide addresses many of the typical challenges users face and offers simple solutions to get you back on track.
8. Exploring Alternatives
While Photoshop 7 is a fantastic option, it may not be for everyone. If you’re looking for something more modern or don’t have the resources to upgrade, there are other graphic design tools you can try. Check out our alternatives to Photoshop 7 to see how they compare.
Conclusion
Now that you have the basics of Photoshop 7 under your belt, it’s time to start experimenting! Photoshop 7 offers a wide range of powerful features for beginners and seasoned professionals alike. By mastering the basic tools and techniques outlined in this guide, you’ll be on your way to creating stunning designs in no time.
If you haven’t already, head over to our Photoshop 7 download page to get started and begin your creative journey. As you continue learning, you’ll uncover even more features that will help you elevate your designs to the next level.
Happy designing!