How to install Windows 10 from USB/DVD
Once you have created the ultimate Windows 10 bootable USB using the Rufus of any other tool (as mentioned above), you are ready to install Windows 10 using this USB flash drive.
Windows 10 – Install
Prepare for installation
- System requirements
- Backup your files and apps
- Change boot order of system firmware
- Change boot order using UEFI
- Change boot order using BIOS
- Disconnect extra peripherals
- Check battery status of laptop
Create Installation Media
- Create a bootable USB using Media Creation Tool
- Create Windows 10 USB from ISO file (using Rufus)
Install Windows 10
- Clean Install
- Clean install Windows 10 from DVD
- Clean install Windows 10 from USB
- Clean install Windows 10 from ISO file
- Clean install Windows 10 from (MCT) Media Creation Tool
- Clean install Windows 10 from local image reset
- Clean install Windows 10 from cloud download reset
- Clean install Windows 10 from Advanced startup options
- Upgrade from existing Windows OS (Windows 8, or Windows 7)
- Update your current Windows 10 to a newer version
- Dual boot Windows 10 with other Windows OS (Windows 11, Windows 8, Windows 7) or Linux OS, macOS, or even Android desktop operating system.
- Install Windows 10 or virtual machine (VirtualBox, VMware Player).
- Installing a new Windows 10 update may also require you go through the installation steps.
Finalize the setup
- Confirm activation
- Check for updates
- Install missing device drivers
- Restore your files
- Install apps
If you have not downloaded Windows 10 yet, you can get the latest version of Windows 10 from following sources:
If you only want to upgrade instead of clean install, then download Windows 10 Update Assistant Tool here.
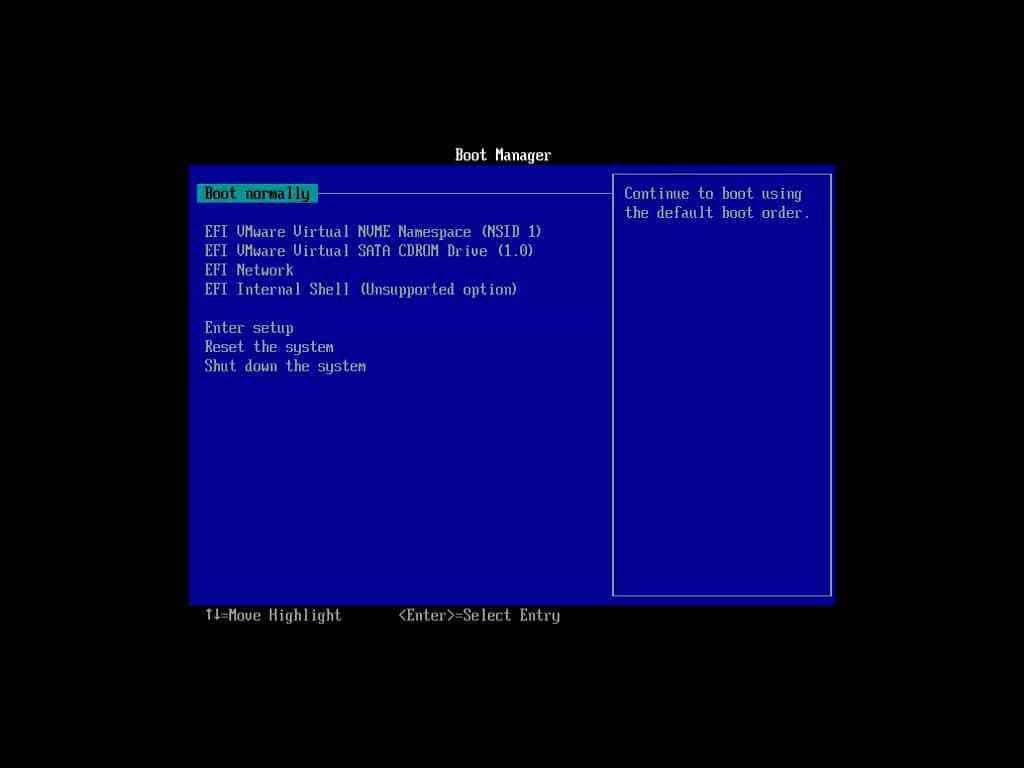
Make sure you have Win 10 installation USB disc with you. Plug this flash drive into USB port of computer, then start (or restart) computer and follow these steps:
- Press boot menu key (usually F9 for most computers) and select USB drive from the list.
- Press any key on your keyboard when prompted.
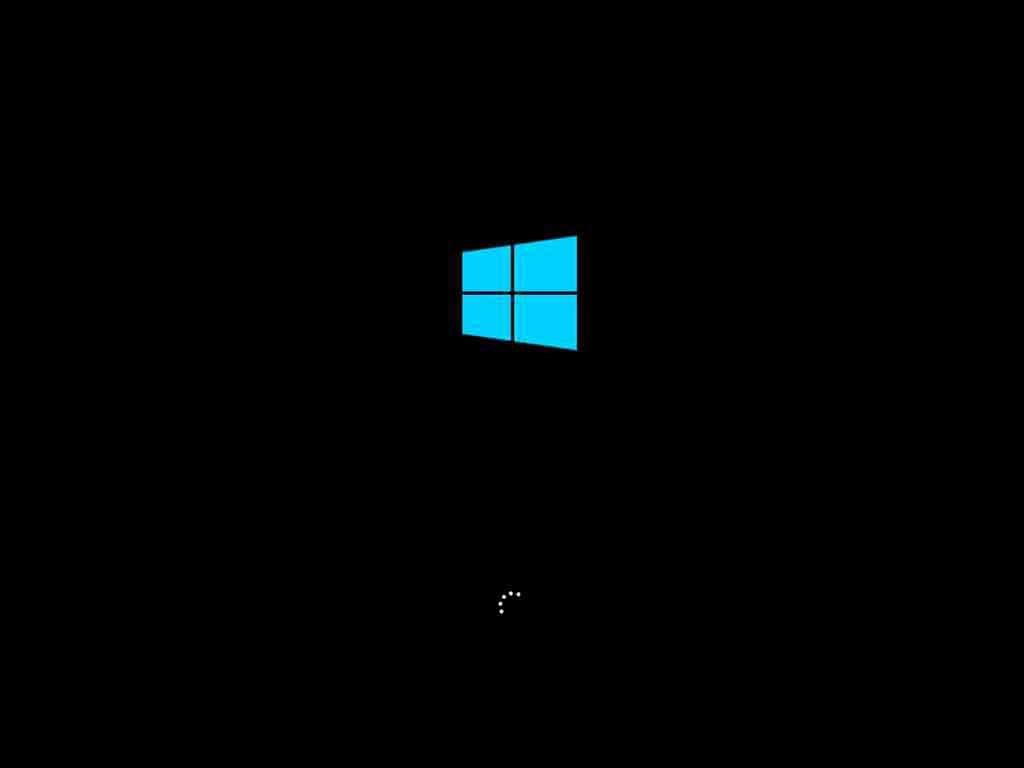
- Windows installation files will take a while to load and Windows 10 installer setup will start.
Prepare your computer for Win 10 Installation
Now you are in installation setup. Follow further steps to start and finish installation process.
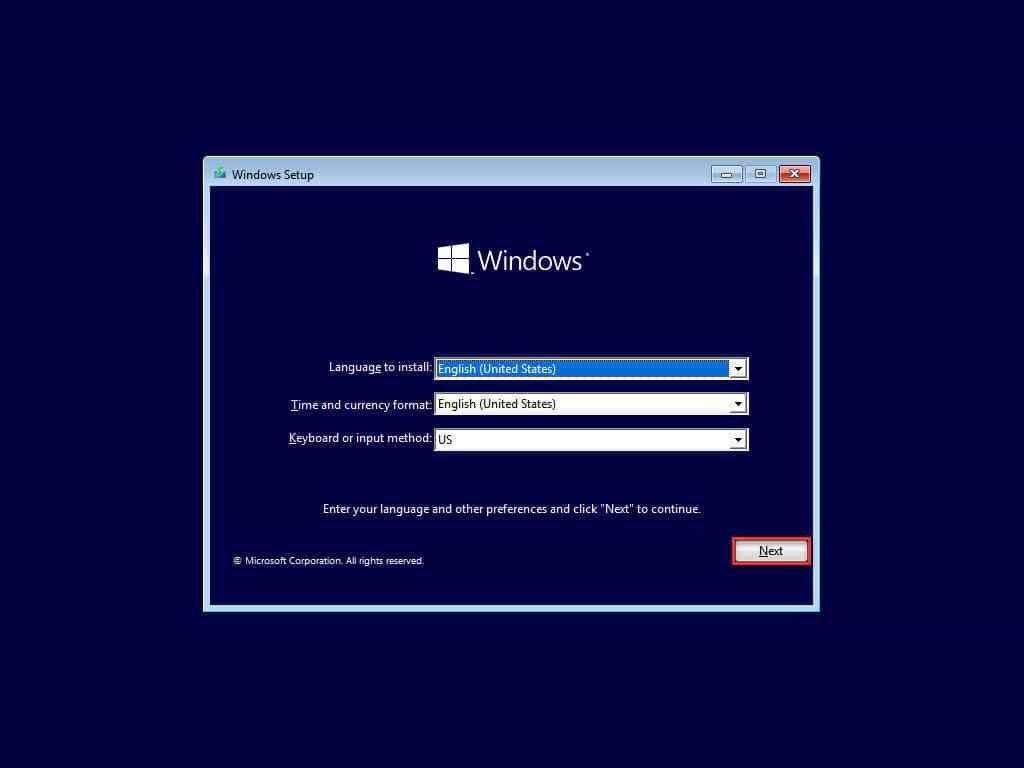
- Choose language, time and currency format, keyboard or input method for your computer.
- Press Next button
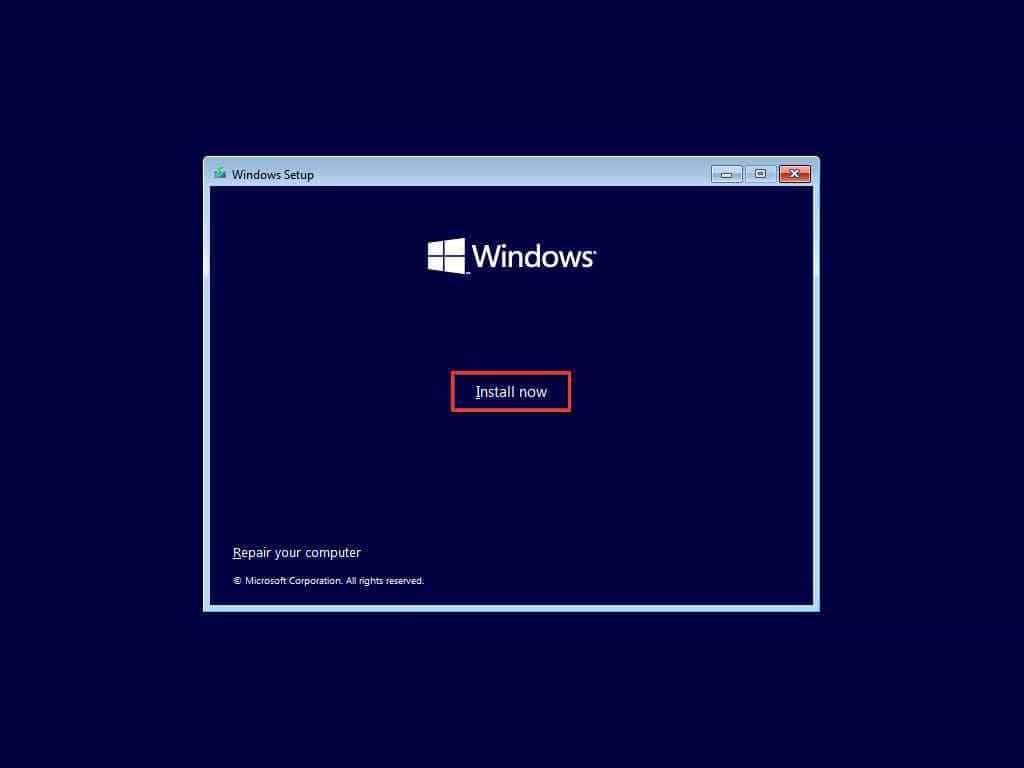
- Press Install Now button to start installation at this stage.
- Wait a few seconds while setup begins.
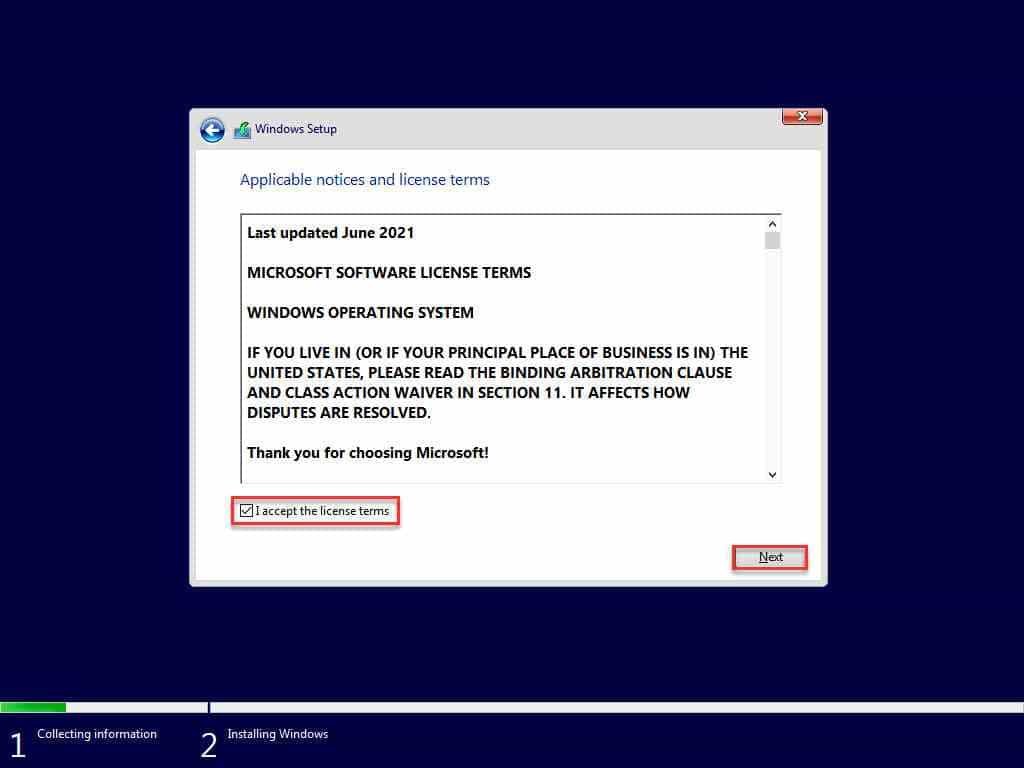
- Windows license terms dialog box will appear. Check the box with label I accept the license terms and press Next button.
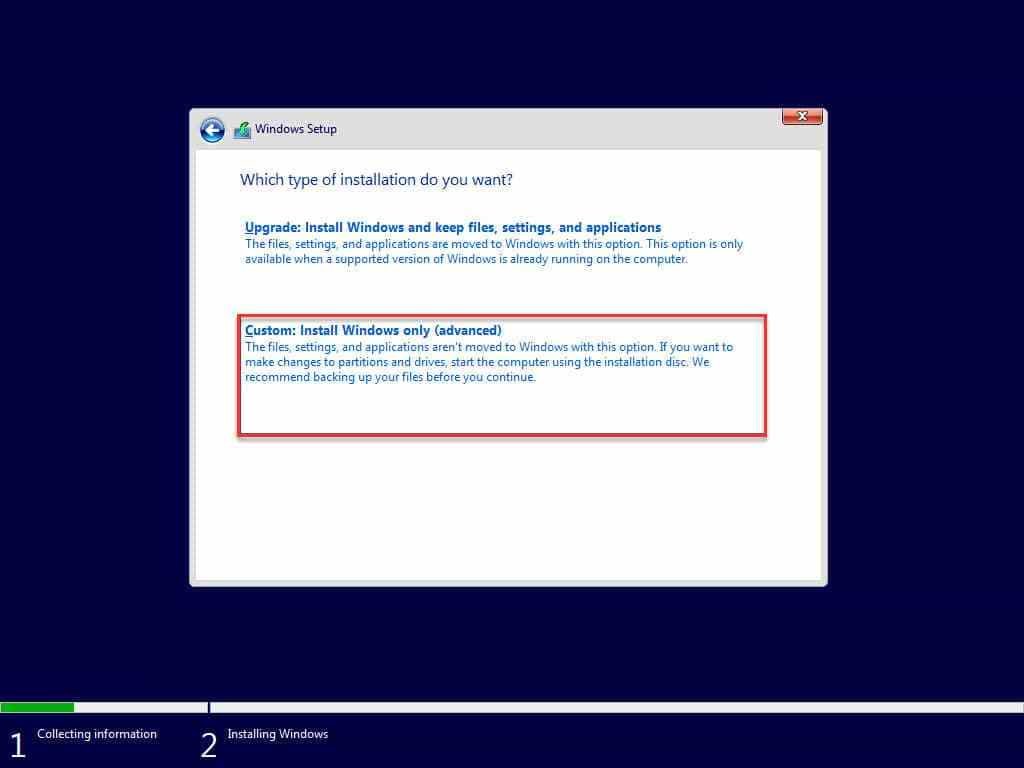
- Choose the type of installation; upgrade to upgrade existing Windows or Custom (advanced) for a fresh clean installation.
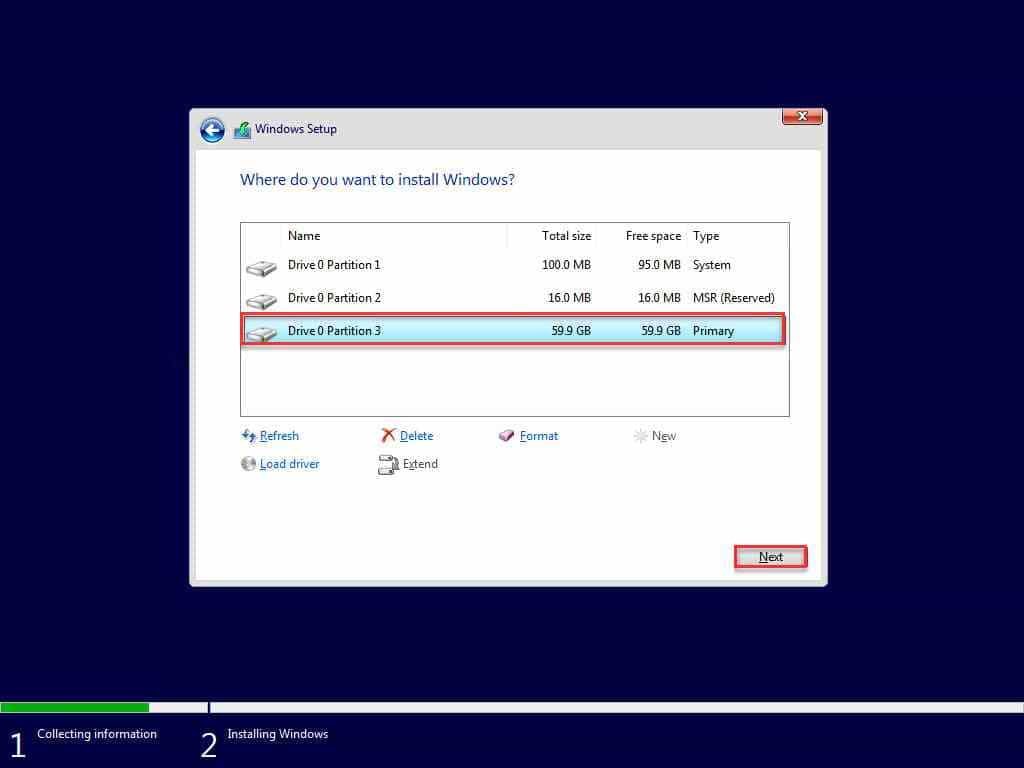
- On next screen, select the drive you want to install Windows 10. Usually, it is the same drive you already have installed operating system.
- Select drive and format or press Next button to auto format. A confirmation box will appear before formatting, select OK to format and continue.
Windows 10 Setup (files copying and installation)
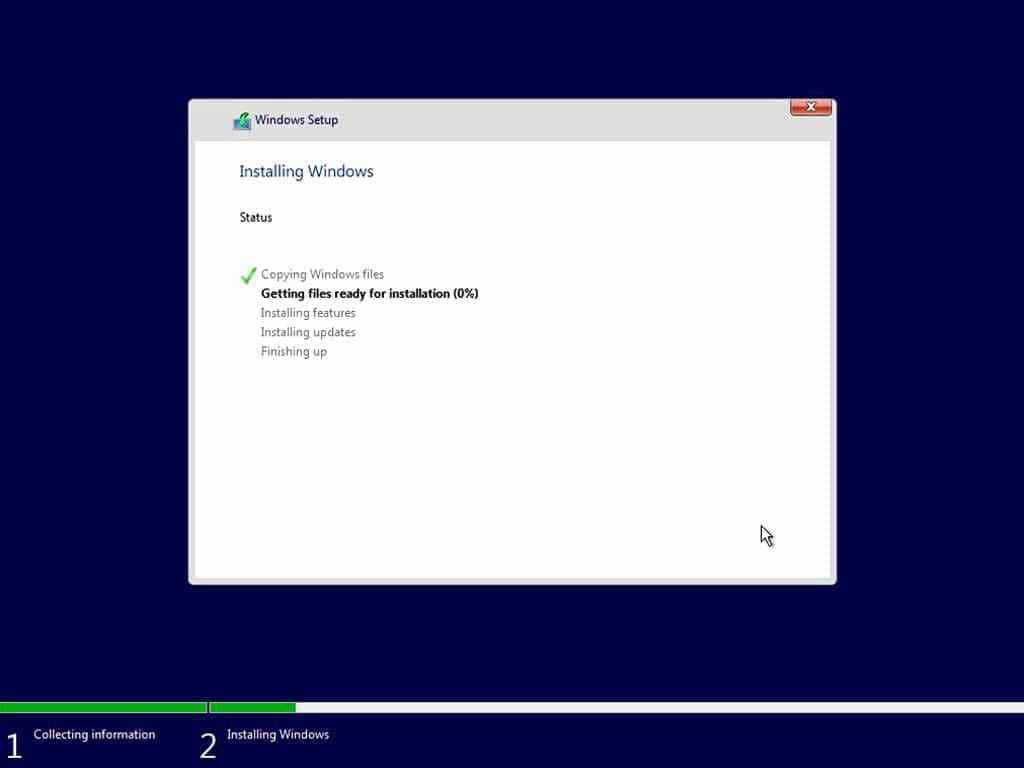
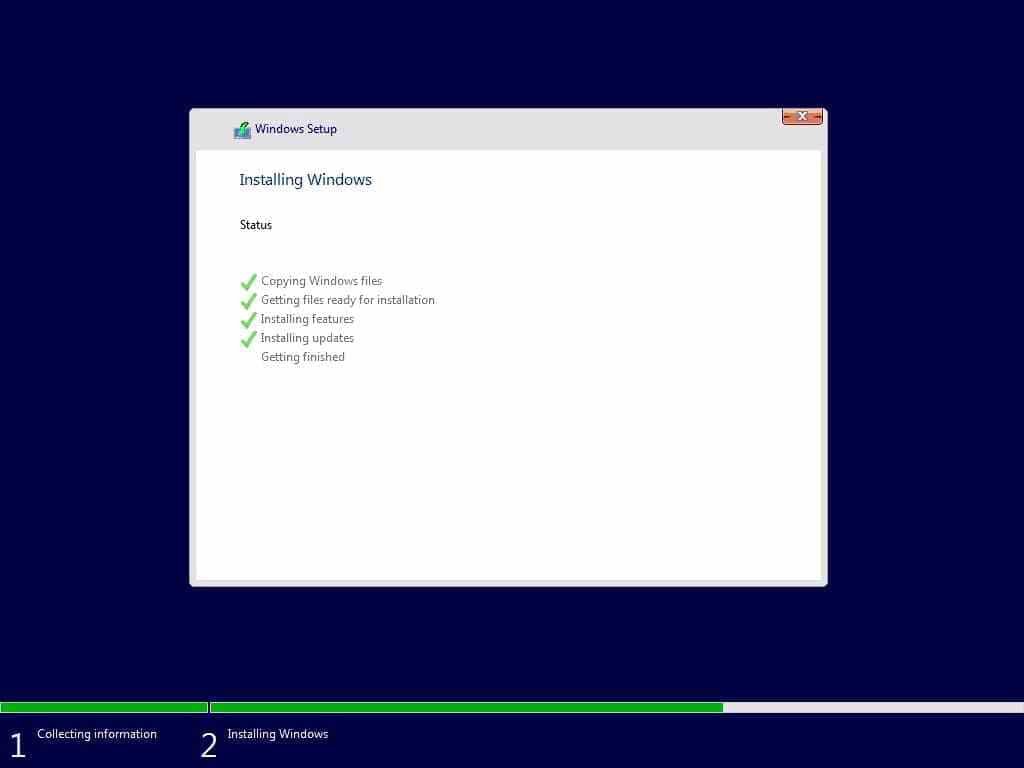
Now setup will start copying Windows files, expanding files, features installation and install updates included in ISO file. This process will take a while (about 10-30 minutes) to finish and then your computer will restart automatically.
Next, Windows will start for the first time after installation. Just wait again while Windows 10 setup updates registry files and start services.
Setup will finalize the installation process and restarts your computer again.
The actual setup of Windows 10 installation is complete here. But you still have to configure things before you can actually start using Windows.
Windows 10 Basic Configuration (after setup)
This time, after restart, setup will prepare your computer for first use, check video performance and a few other things.
Next a dialog box will appear where you can enter user name and computer name.
Next screen will ask you enter a password for login to Windows 10. This is optional. You can skip password by leaving boxes blank and press Next button.
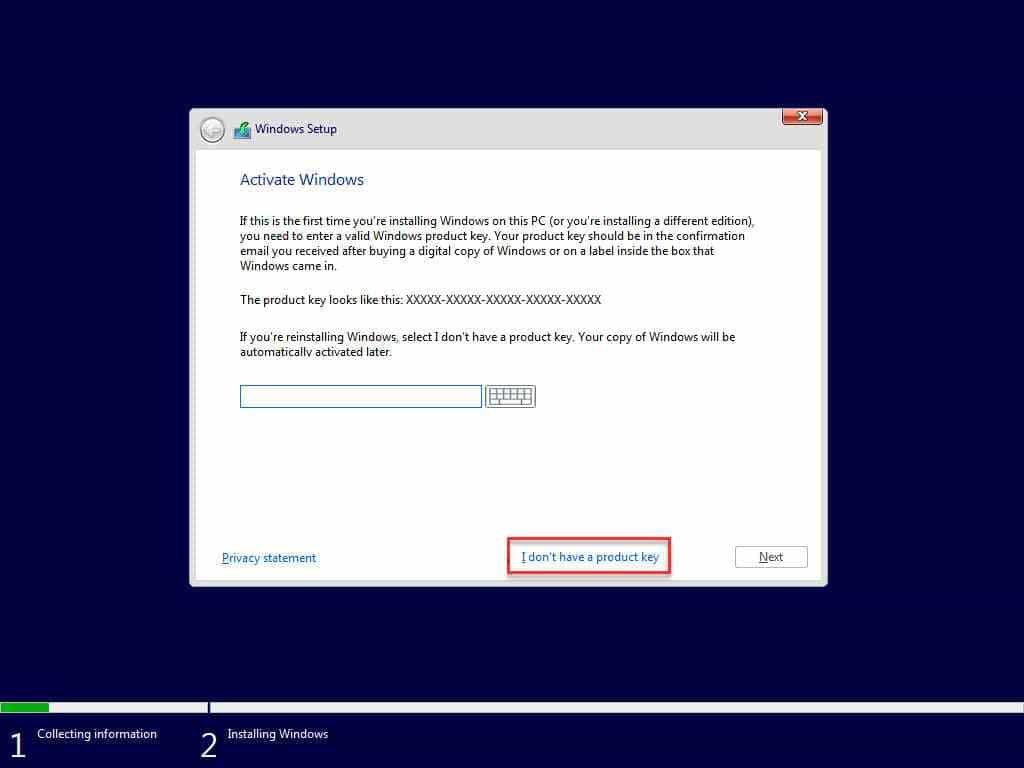
Next dialog box will ask you to enter Windows 10 Product Key. Well, this is also kind of optional step. You can enter key if you have or skip this step and press next to continue to install Windows 10 without product key.
Now on next screen, choose an update option out of following 3 options:
- Use recommended settings (to install all updates)
- Install important updates only (to install only security and critical updates)
- Ask me later (do not enable automatic updates)
Next, set your time and date settings. Choose Time zone and setup will try to automatically set time and date according to your country standard time. If it does not, you can set time and date manually.
In next screen, choose a network type. Home Network is usually appropriate for most users. Press next and Windows will try to connect to your chosen network.
Almost done, Windows will prepare your desktop. This is also an automated step. Just wait a few seconds and your fresh Windows 10 desktop will appear in front of you.
All done. Just feel the delight and start using Windows 10 edition.
How to install Windows 10 on Virtual Machines?
For some reason, if you want to install Win 10 on virtual machines like VirtualBox or VMware etc. Here is a brief guide for these type of applications.
How to install Windows 10 on VirtualBox?
First of all, download VirtualBox for Win 10 (if you do not have it already).
- Download Windows 10 ISO image from download section (above on top of this page)
- Launch VirtualBox and start creating new virtual machine.
- Now select Windows 10 ISO image and accept default settings.
- Start virtual machine you just created and continue with Windows 10 setup installer.
Installation on VirtualBox is almost same to normal installation on real computer.
How to install Windows 10 on VMware
First of all, download VMware (if you do not have it already).
- Download Windows 10 ISO image from download section (above on top of this page)
- Launch VMware and start creating new virtual machine.
- Now select Windows 10 ISO image and accept default settings.
- Start virtual machine you just created and continue with Windows 10 setup installer.
Installation on VirtualBox is almost same to normal installation on real computer.
Steps to install
Open BIOS setup of your PC, and set boot order by prioritizing the USB flash on top.
Press any key on your keyboard to initialize setup.
Windows 10 setup will boot from flash disk or image.
Choose a language to install for Windows 10, time and currency format and keyboard or input methods according to your preferences.
After choosing your basic preferences, press Install now button on next screen to start installation.
You can activate Windows 10 right away during installation by entering Windows 10 product keys. If you don’t have product keys, you may leave this box blank and press I don’t have a product key button to continue installing Windows 10 trial without product keys.
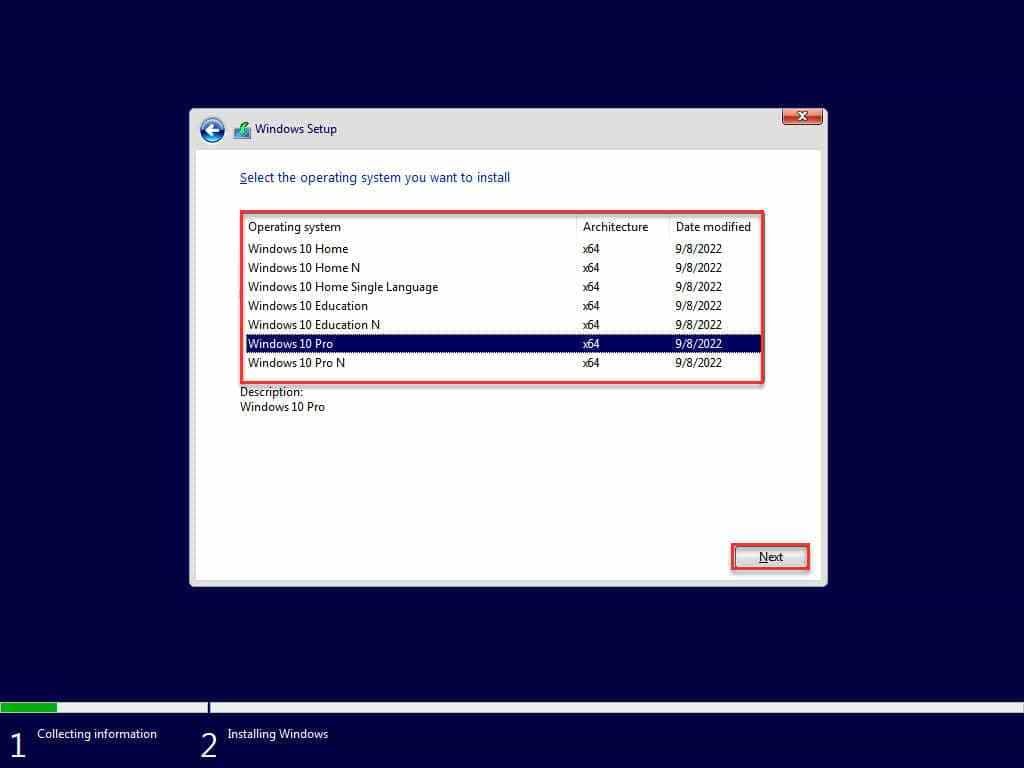
Choose which Windows 10 edition you want to install as your operating system. We recommend choose one from Windows 10 Home, Windows 10 Pro, or Windows 10 Education edition. The N editions are not suitable for most people. Moreover, you may see x64 or x86 option. We recommend go with x64 system architecture.
Accept License and Terms and press Next button.
To perform a clean installation of Windows 10, you have to choose Custom: Install Windows only (advanced) option. In case you are upgrading from either Windows 7 or Windows 8, or even an old version of Windows 10, you can go with the Upgrade (first one) option.
Choose the partition where you want to install Windows 10. Make sure the drive has enough space. Moreover, remember that all data on that partition will be erased permanently before proceeding the installation process. Press Next button to continue.
Setup will begin copying files to your selected partition and make them ready for installing. This process can take some while, so please be patient.
After copying files, the installation will be performed automatically including installing Windows features and Windows updates.
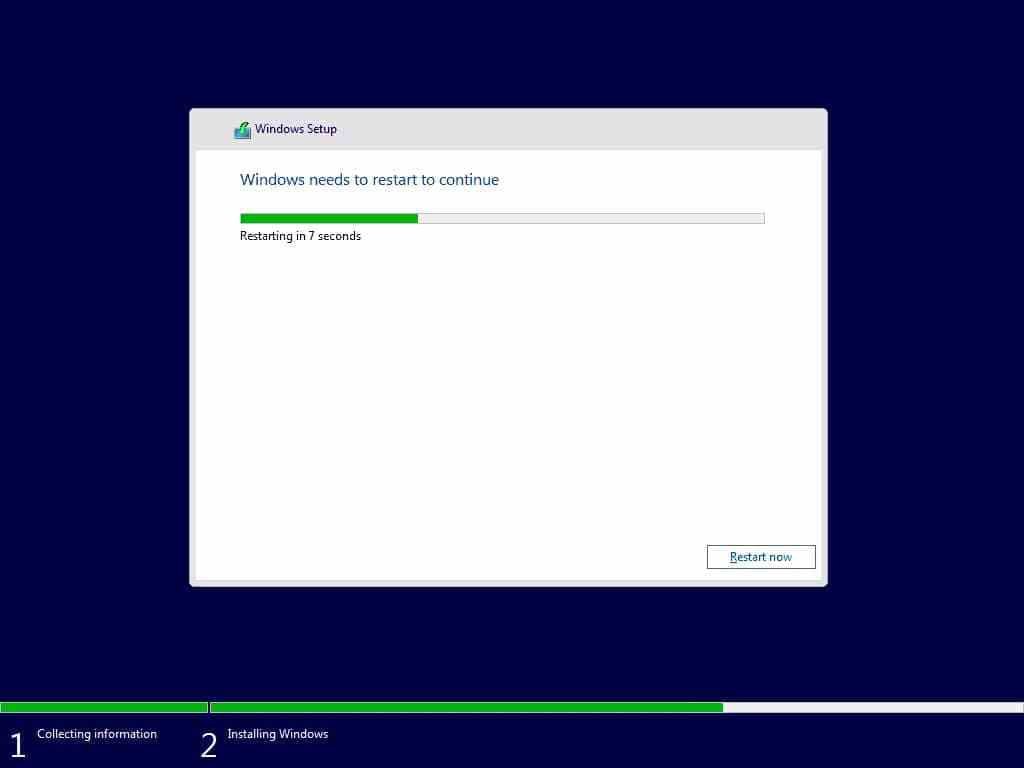
When finished, the system will show a progress bar alarming about system restart in a few seconds. It takes just a few seconds, you can either wait or just hit Restart now button to reboot instantly.
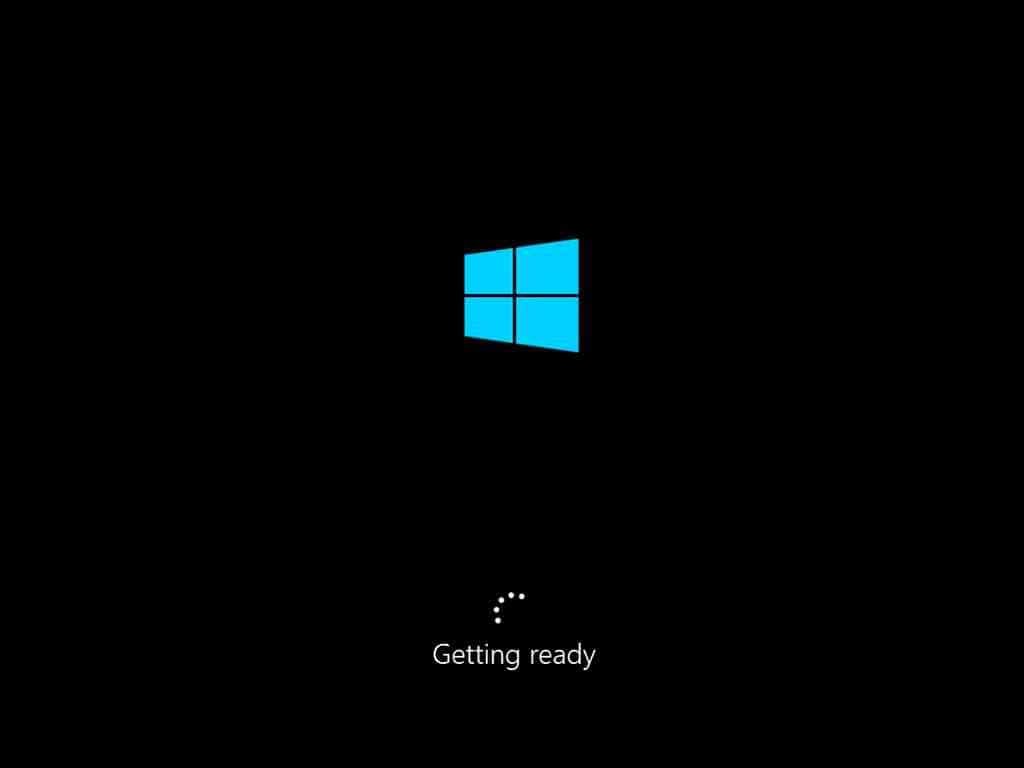
The first boot after installation screen will load some important files and configure settings in the background to start further steps of the Windows setup.
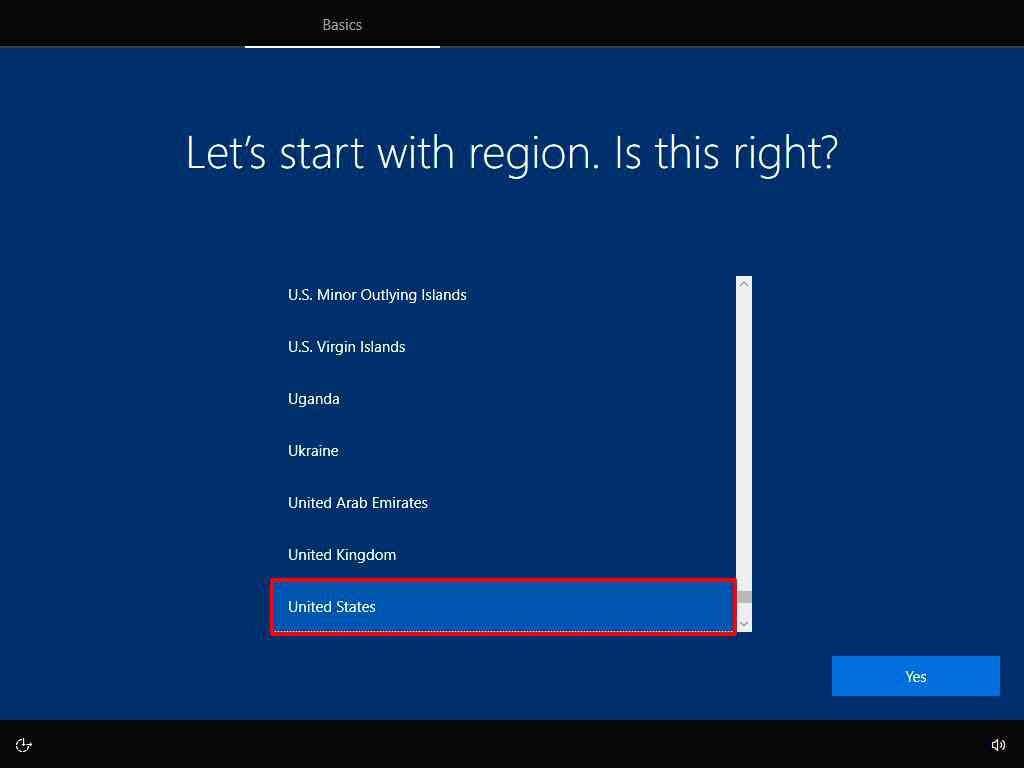
The Basics section will start asking to select aregion. Choose your region from the list and press Yes button.
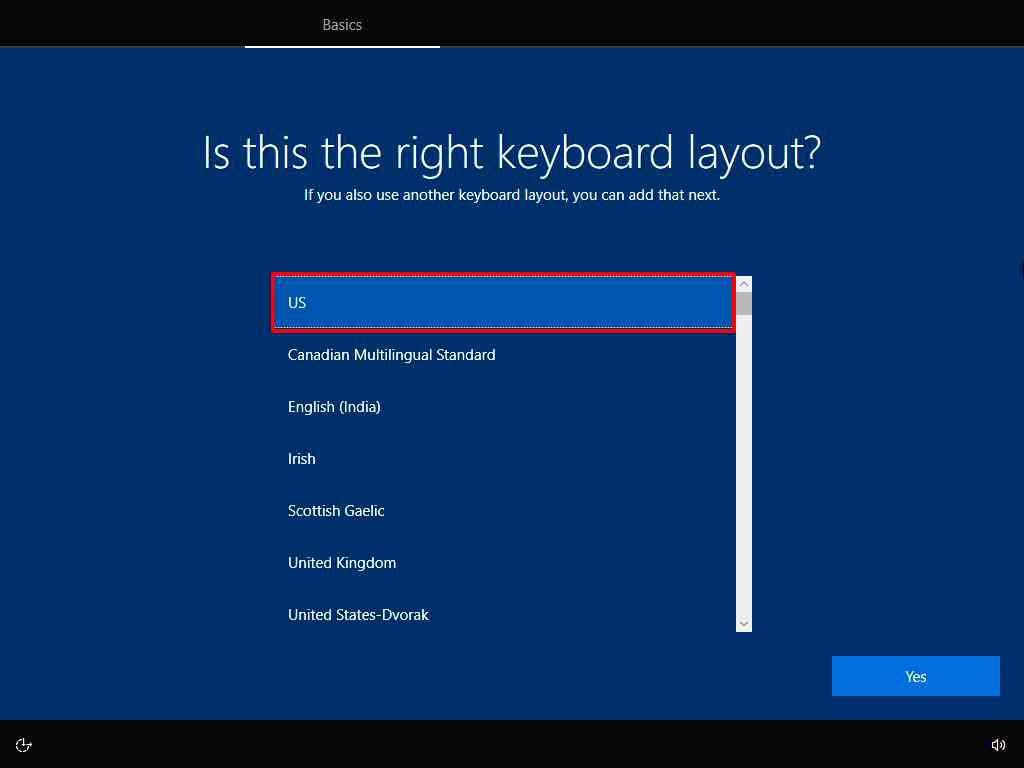
Select a keyboard layout of your choice, and press Yes button.
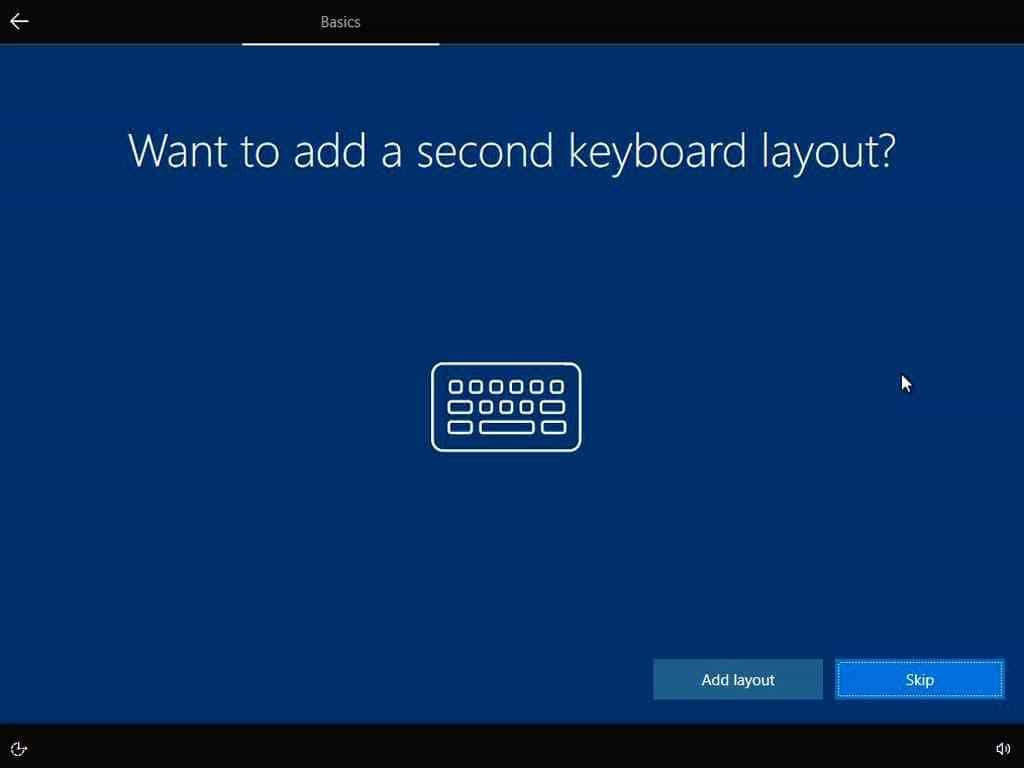
You can add another keyboard layout if you like so. This is an optional step and you can either setup a second keyboard layout by press Add layout button or skip to next step by pressing the Skip button.
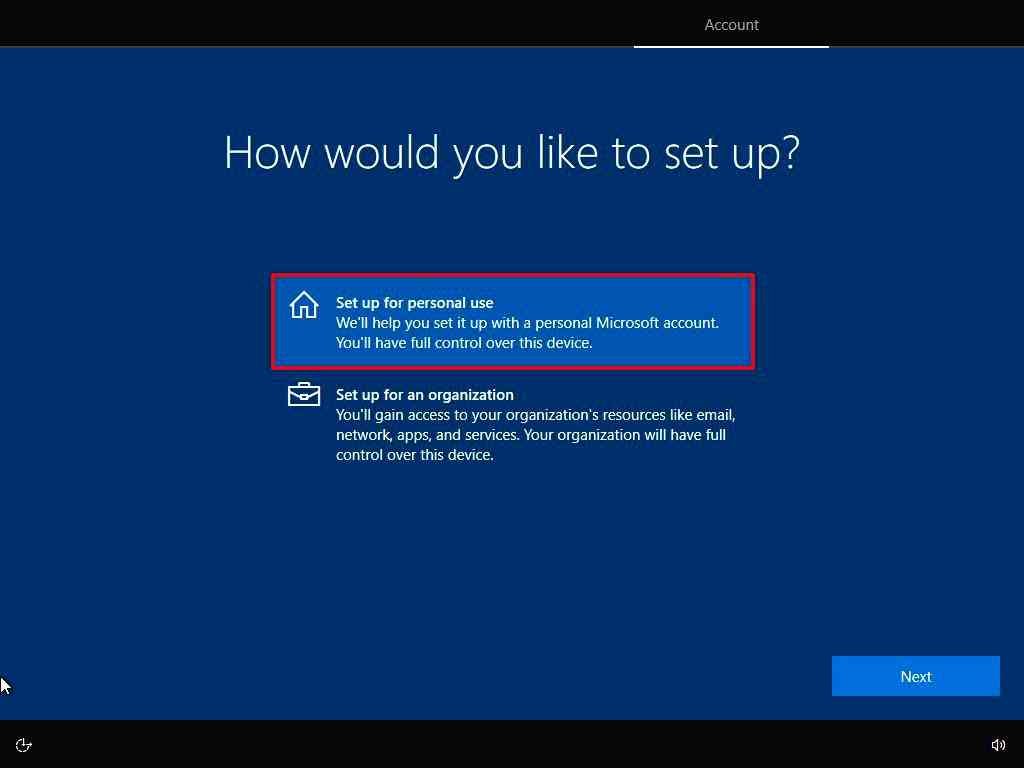
Select how would you like your PC to setup. You can either choose for personal use or for an organization, depending on your requirements.
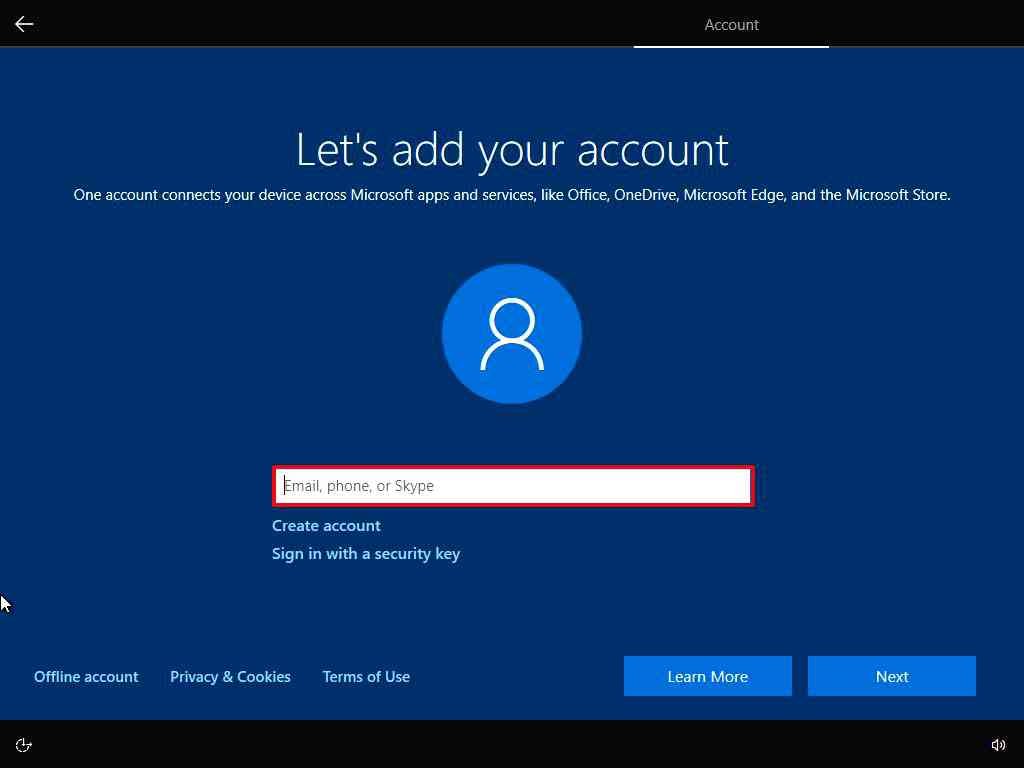
Now you are ready to add your account. Microsoft recommends adding a Microsoft account to login to Windows. You can enter your email if you already have a Microsoft account or create a new Microsoft account for Windows 10 by clicking on Create account option.
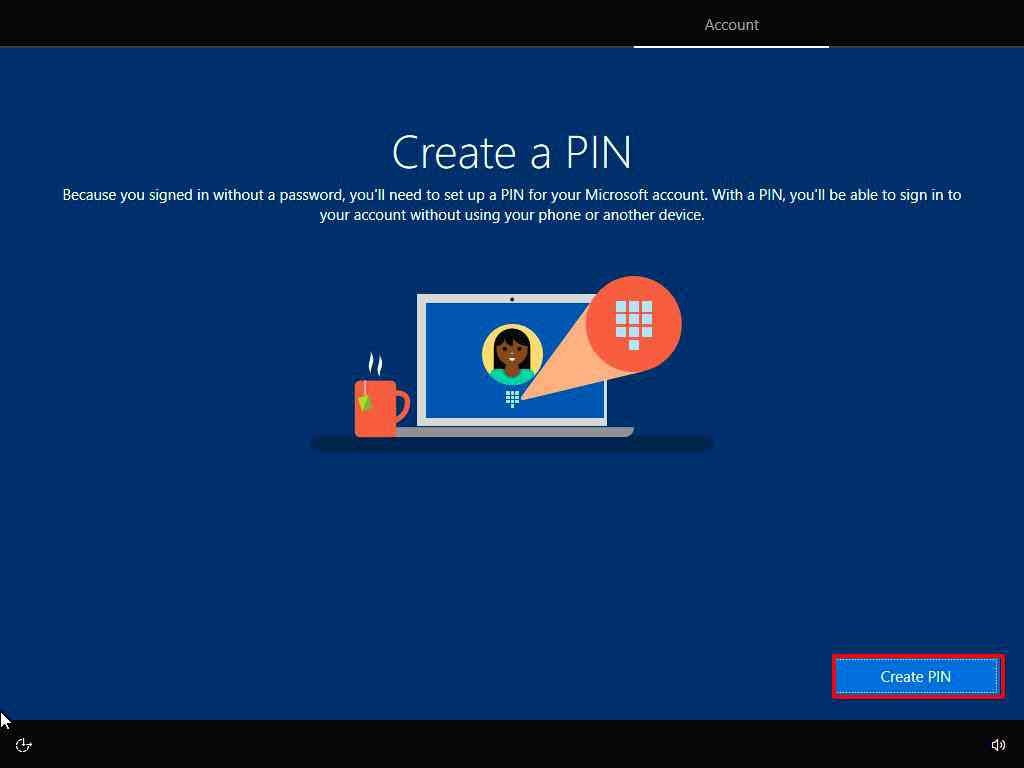
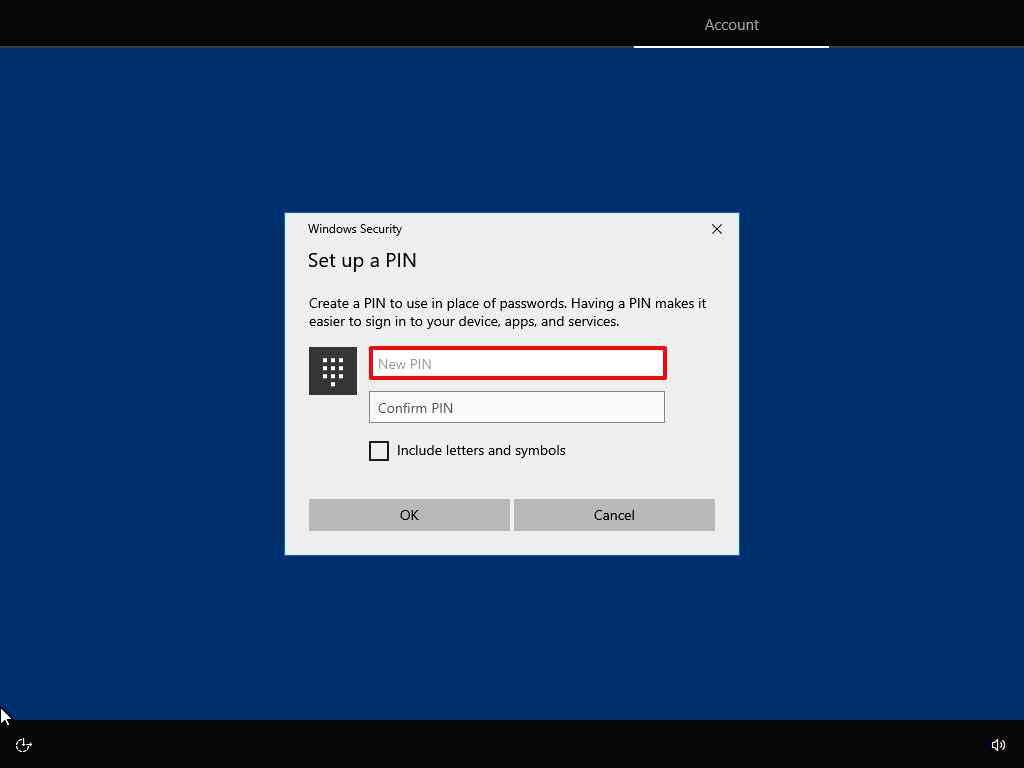
Create a PIN code that will help you bypass two step verification. You will just have to enter your PIN code to login to Windows 10 instead of entering password of Microsoft account or using phone or another device. Press Create PIN button.
Now setup a PIN code. Make sure your PIN is not easy enough to guess.
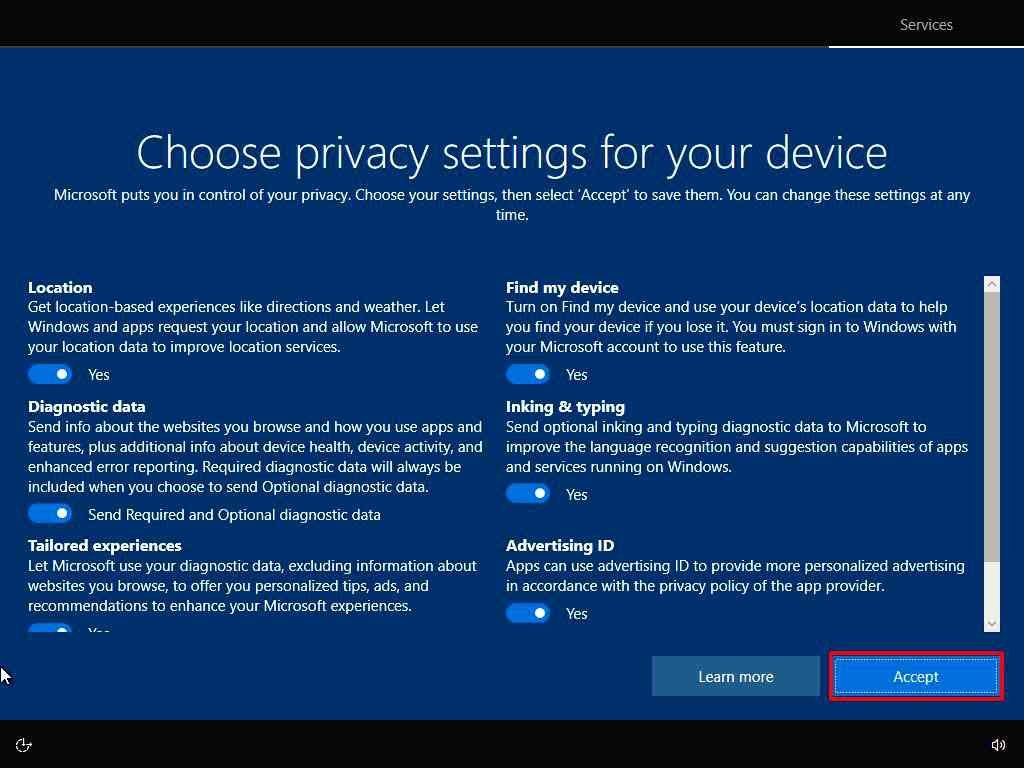
Choose privacy settings for your PC includes toggle options like location, sharing diagnostic data, tailored experience, find my device, inking and typing, allowing system to access your advertising ID. Turn options ON or OFF according to your choice.
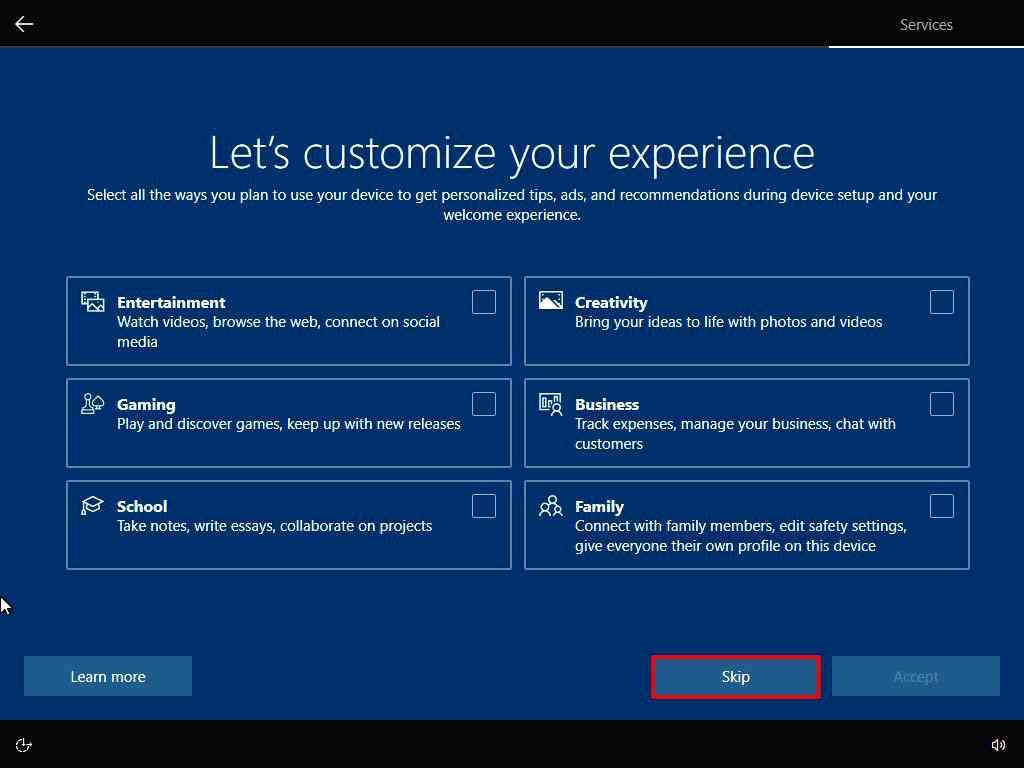
Next screen will ask you to select preferences to get personalized tips, ads, and other recommendations. Most users prefer to skip this step.
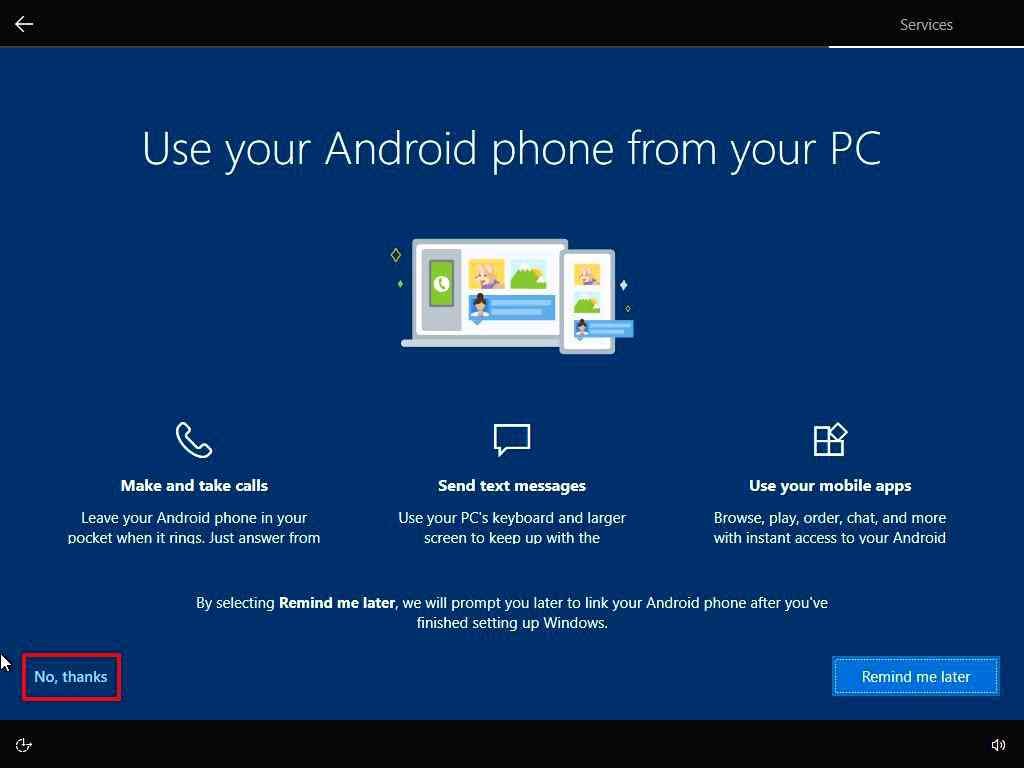
You can connect your Android phone to your Windows 10 PC. This type of connection will help you make and receive phone calls, send and receive sms or text messages, and even use your mobile apps if your phone is supported by Windows 10. Again, most users prefer to skip this step by pressing No, thanks button.
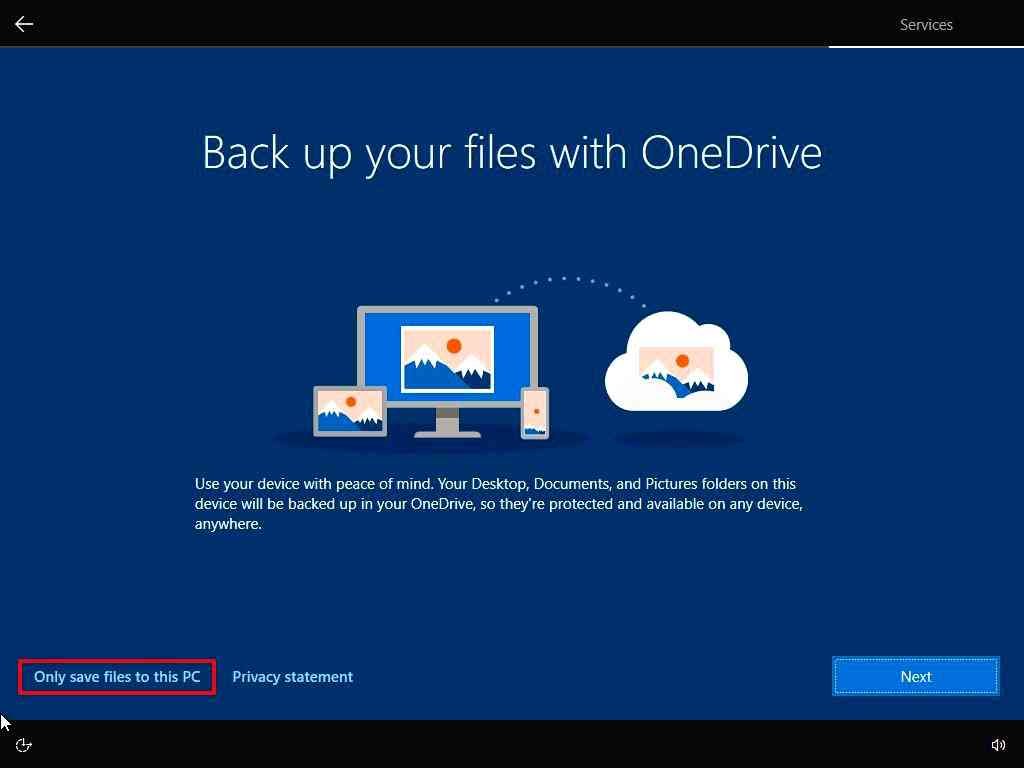
You can backup your personal files with OneDrive. To do so, press Next button, or select Only save files to this PC option to skip OneDrive backups.
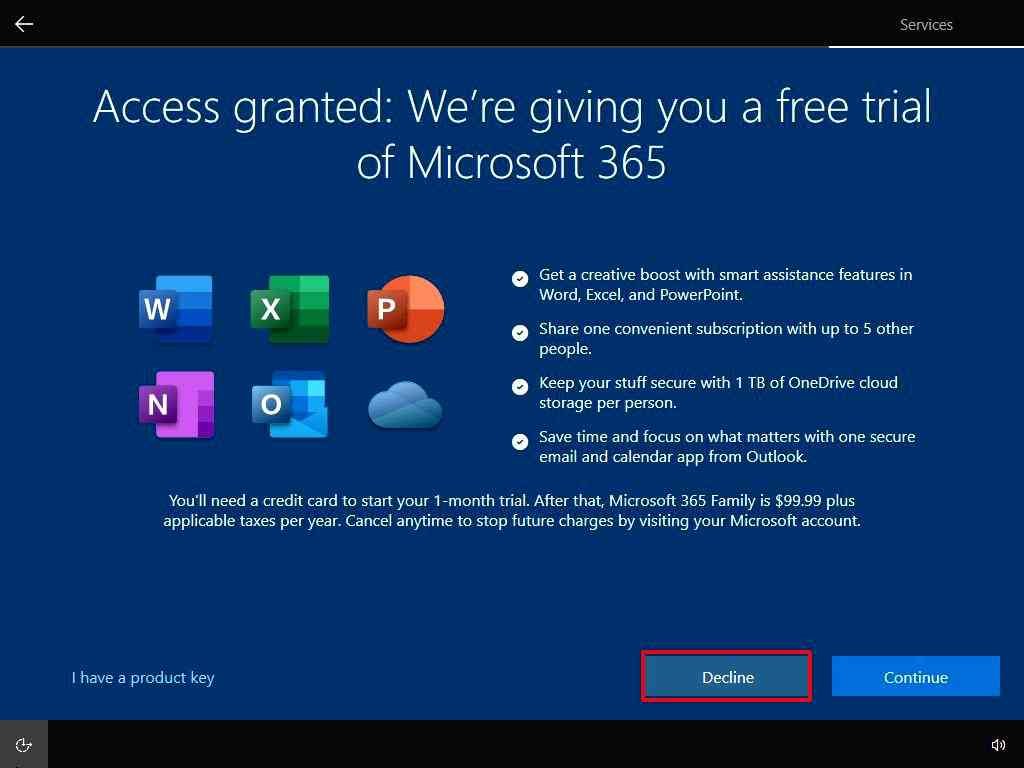
Microsoft offers a free trial of Microsoft 365 apps and services during Windows 10 installation setup. If you already have Microsoft 365 account you can enter product key by clicking I have a product key option on right-bottom. To continue with a free trial, press Continue button. Or press Decline button to skip Microsoft 365 offer.
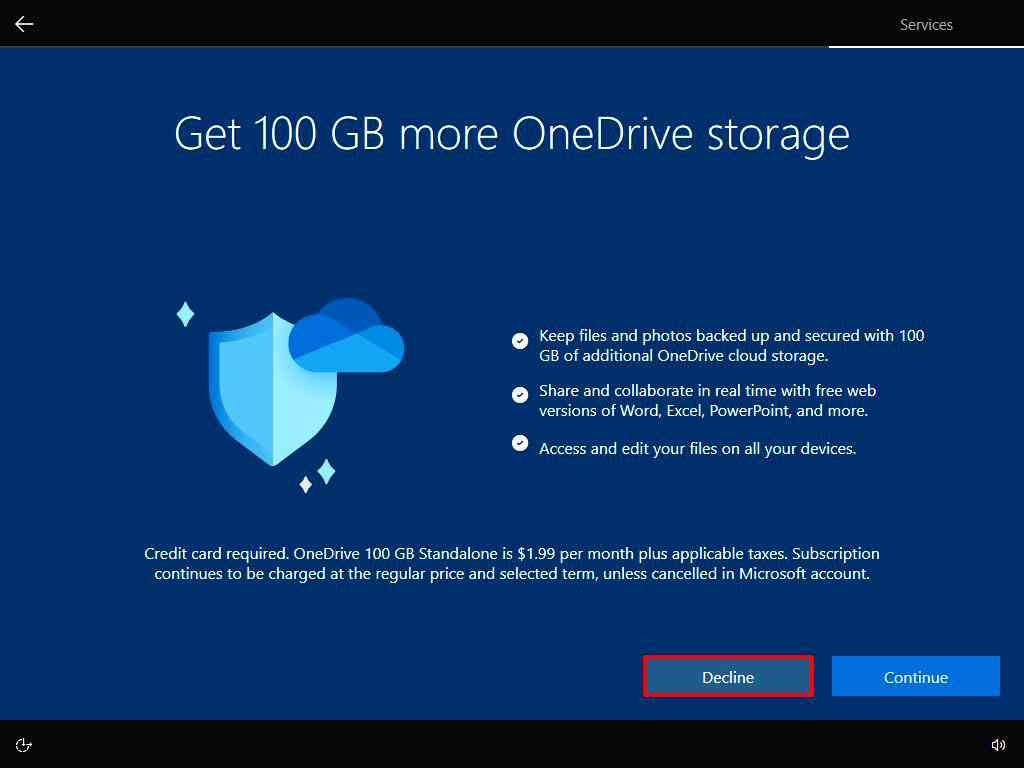
Yet another offer from Microsoft; OneDrive paid subscription to get 100GB more storage. Press Continue if you want to subscribe or press Decline to skip this offer.
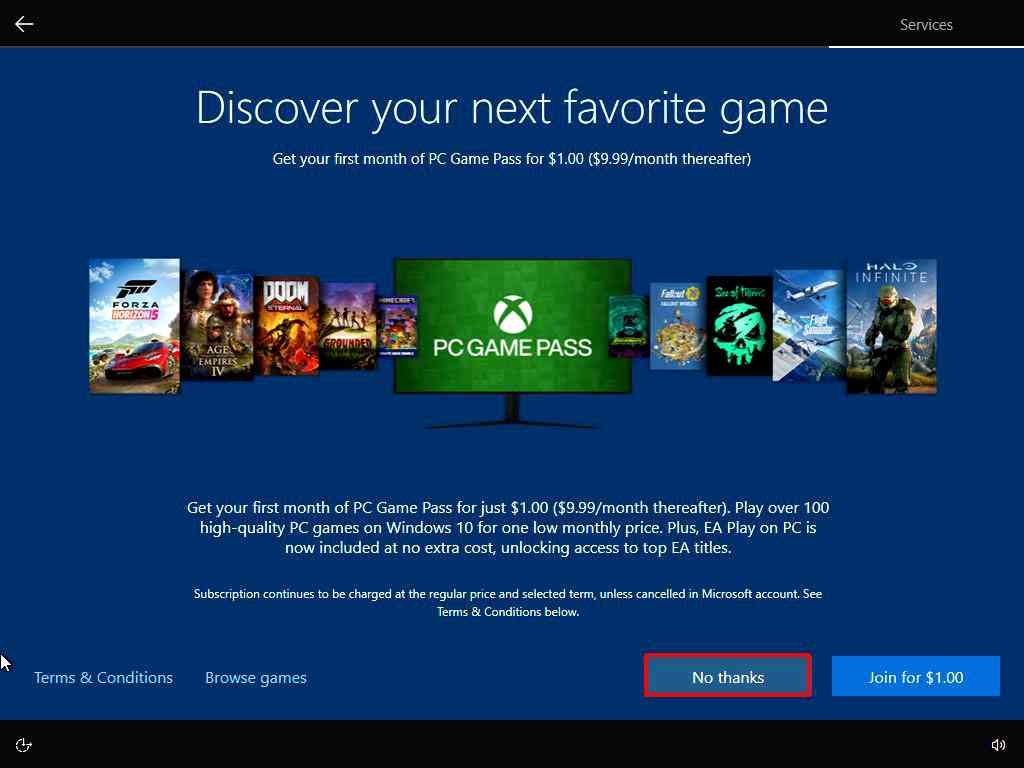
Next you may see PC Game Pass subscribtion promotion offer. Most users like to skip it by pressing No thanks button.
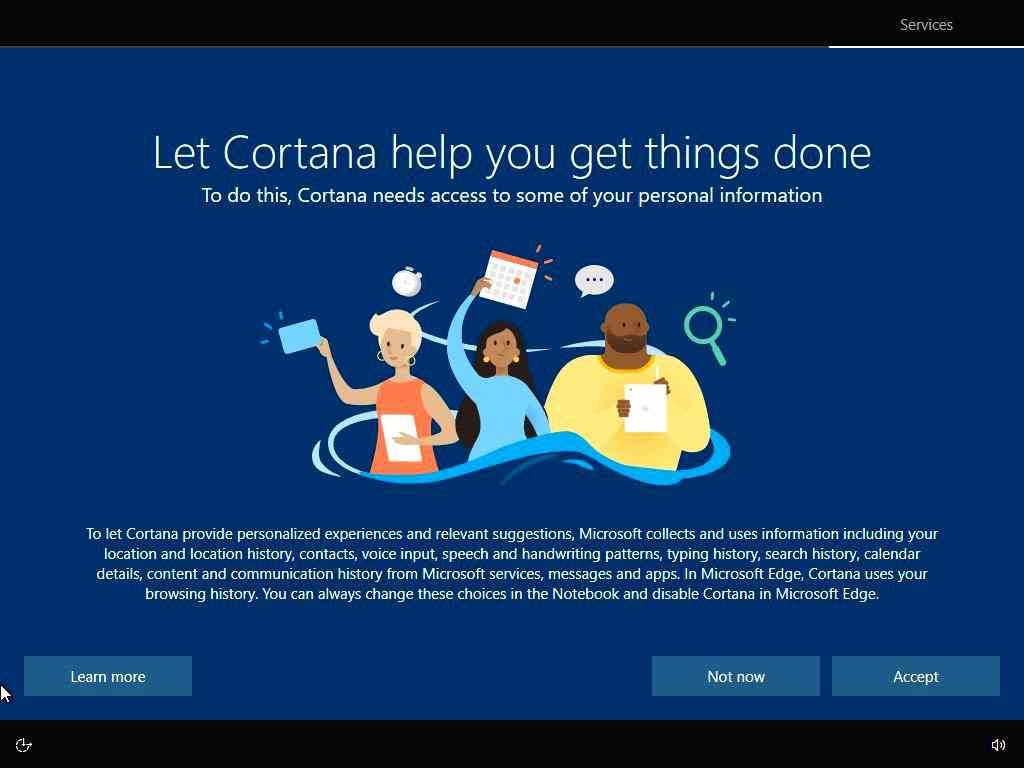
You can setup Cortana by pressing Accept button, or skip Cortana by pressing Not now button.
Now the Windows 10 installation is almost complete.
Just wait while the install process and customization is finalized.
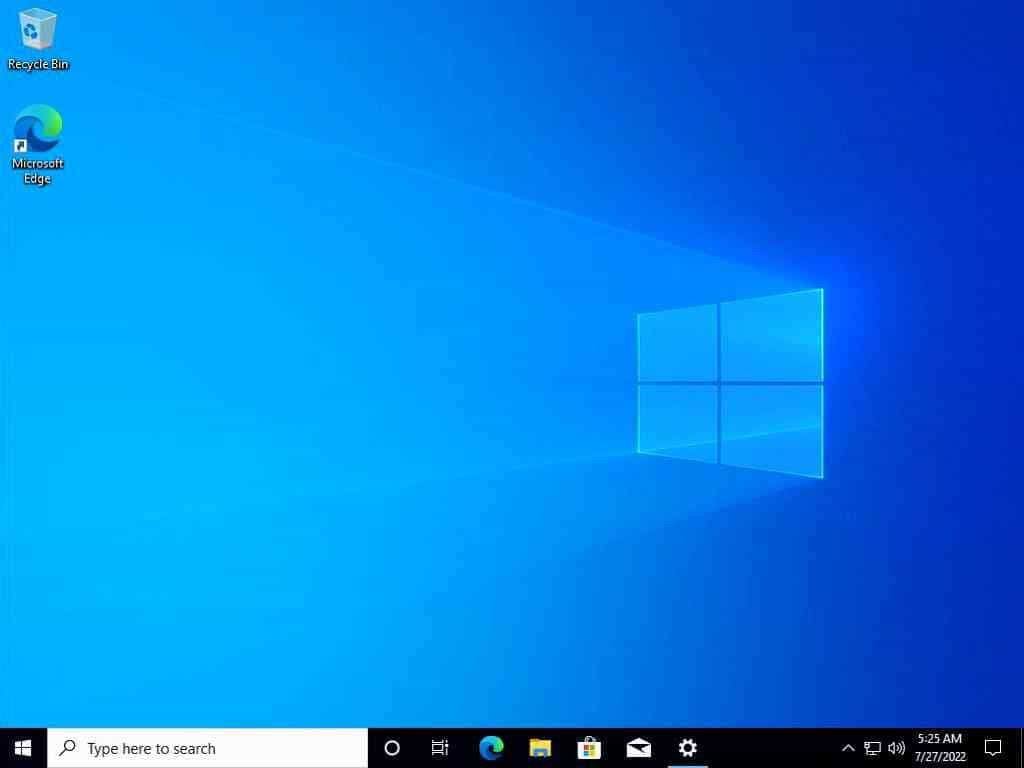
Finally, you will see the desktop screen after successful installation of Windows 10.
Congratulations! You have installaed Windows 10 successfully.
