Content Highlights
The ultimate guide on how to install or upgrade to Windows 11 22H2 on Unsupported Hardware.
This guide will cover the following issues:
- Windows 11 update in Settings is showing the device is up-to-date, but actually, you’re on Windows 11 21H2 rather than 22H2.
- You have Windows 11 22H2 ISO file, but the installation fails by telling unsupported PC hardware.
- Using a trick, you have managed to bypass Windows 11 hardware requirements. But the setup tells you that you will not be able to keep files or apps, and you don’t want to lose your apps or files.
- The setup forces to clean install Windows 11 instead of upgrading or updating.
- While upgrading from Windows 10 to Windows 11, the PC Health Check Tool shows your device does not meet the minimum hardware requirements.
So, if you are facing any of the above problems while upgrading to Windows 11 22H2, here is the working solution for you.
Step 1: Download ISO using Windows 11 Installation Media
This step helps you solve the following issues causing due to language mismatch:
- Not able to Keep apps or Keep files (or both)
- Setup forces performing a clean install of Windows 11
This step solves the issue of not having the option to keep apps or files or any one of them. If you have been trying to install Windows 11 22H2 from 21H1 and the setup does not allow you to either keep apps or keep files option, this issue happens due to language mismatch.
It means the ISO you have downloaded has a different language from your currently installed Windows 11 language.
And the worst thing that happens is if you agree to continue the installation with the disabled keep apps or keep files option, the setup will force a clean install of Windows 11 instead of upgrading the current version to 22H2.
The solution to this language mismatch is using Windows 11 Installation Media (aka Media Creation Tool). The Media Creation Tool automatically detects the current language and suggests downloading ISO in the same language. As a result, the language mismatch issue will be fixed.
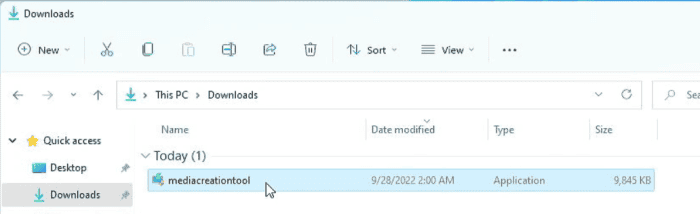
Go to Windows 11 download page from this link and download Windows 11 installation tool.

Run the downloaded file.
Go through the initial steps such as accepting the license agreement etc. And do not change the language defaults, otherwise, the Windows 11 setup will force a clean installation of Windows 11, almost from the scratch. And eventually, you will only be able to keep personal files and the keep apps will be disabled.
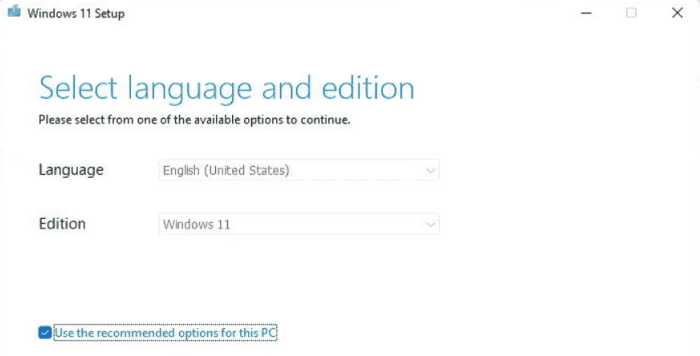
Make sure you choose an ISO file as a download option instead of a bootable USB disk, but you can if you have a USB disk.

Step 2: Replace A File in the Source Folder
This step helps you solve the following issue:
- Your PC does not meet the minimum hardware requirement for Windows 11 or an unsupported hardware message.
The name of the file that you have to replace is the appraiserress.dll file.
Previously, deleting the appraiserress.dll was used to solve the hardware check issue, but it does not work now.
The solution is, to replace the original appraiserress.dll with a modified appraiserress.dll file that fools the setup by indicating the system meets all hardware requirements to install Windows 11.
Download the modified appraiserress.dll file from the link below.
To replace the file, first, extract the ISO contents. There are two easy ways to do so:
First, if you have installed WinRAR or 7-Zip application, just right-click the Windows 11 ISO file and extract files.
The second method is, double click the ISO file, and the ISO will be mounted to the virtual DVD in your computer. Just select all files, copy, create a folder on the desktop and name it 22H2, and then paste files in that folder.
After successfully copying files from the virtual DVD to the 22H2 folder, copy the appraiserress.dll file that you downloaded (or download it here if you have not already downloaded it), and paste in the sources folder. The original file will be replaced by the modified file.
Step 3: Install Windows 11 22H2
This step helps you solve the following issue:
- Despite replacing the original appraiserress.dll with a modified one, the setup still shows unsupported PC hardware or a similar message and fails to install Windows 11.
Run the setup file from the 22H2 folder to launch Windows 11 installation setup.
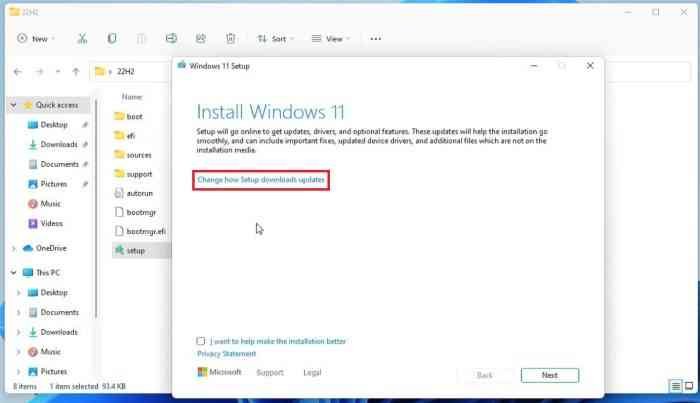
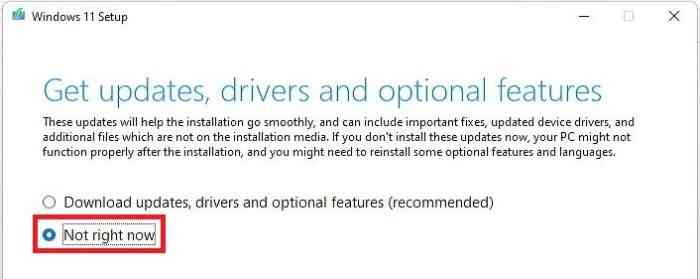
We recommend disconnecting your Internet for PC either by turning off the router (hotspot) or disconnecting your PC from the Internet from Windows Settings. Alternatively, you will need to click on the “Change how Setup downloads update” option and then select the “Not right now” option.
If you are surprised why to bother disconnecting from the Internet rather than getting the latest updates, this is required to ensure that the setup could again replace our modified appraiserress.dll file with an updated file. And it will clearly disqualify our PC during the hardware requirement check.
Once the installation starts, you can reconnect your PC to the Internet. And it is recommended for installing updates.
If you see both files and apps option, it means you are ready to upgrade to Windows 11 22H2 without losing your files and apps.
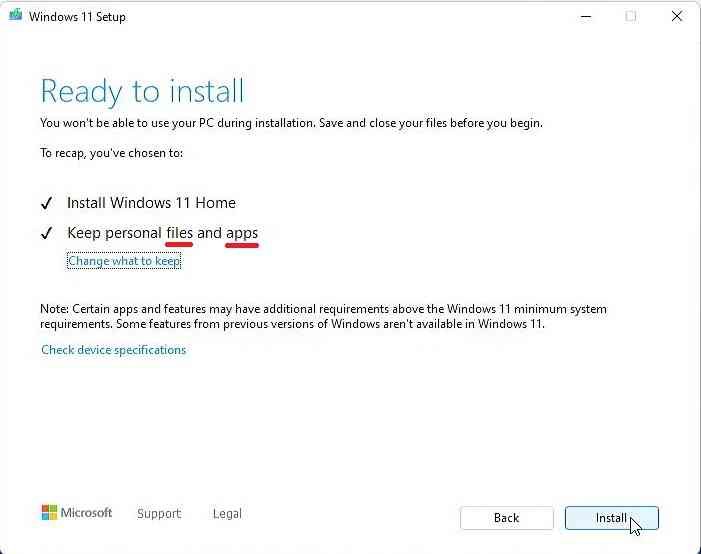
That’s all you needed to do. Now you can proceed with upgradation (installation) as a normal upgrade. Now your PC will upgrade to Windows 11 22H2 without losing data and bypassing the hardware checks.